Congratulations to vtecmec for winning May/June's Lude Of The Month, with his DIY Turbo BB1 build.

>>> Click Here For Profile <<<

Image

Never Ending Story... Prelude race car build.

Tell us all about your Lude, you know you want to ...
User avatar
Buzzonion Vtec
Posts: 214
Joined: Sat Jan 28, 2012 10:29 am
My Generation: 4G

Re: Thread Building - Please don't reply just yet ;-)

Post by Buzzonion Vtec » Sun Jan 29, 2012 6:48 pm

REPLY


Thanks for your continued interest and comments fellas 8)
Still a very long way to go in the big scheme of things but we're now on the home straight as far as 'shell prep goes.
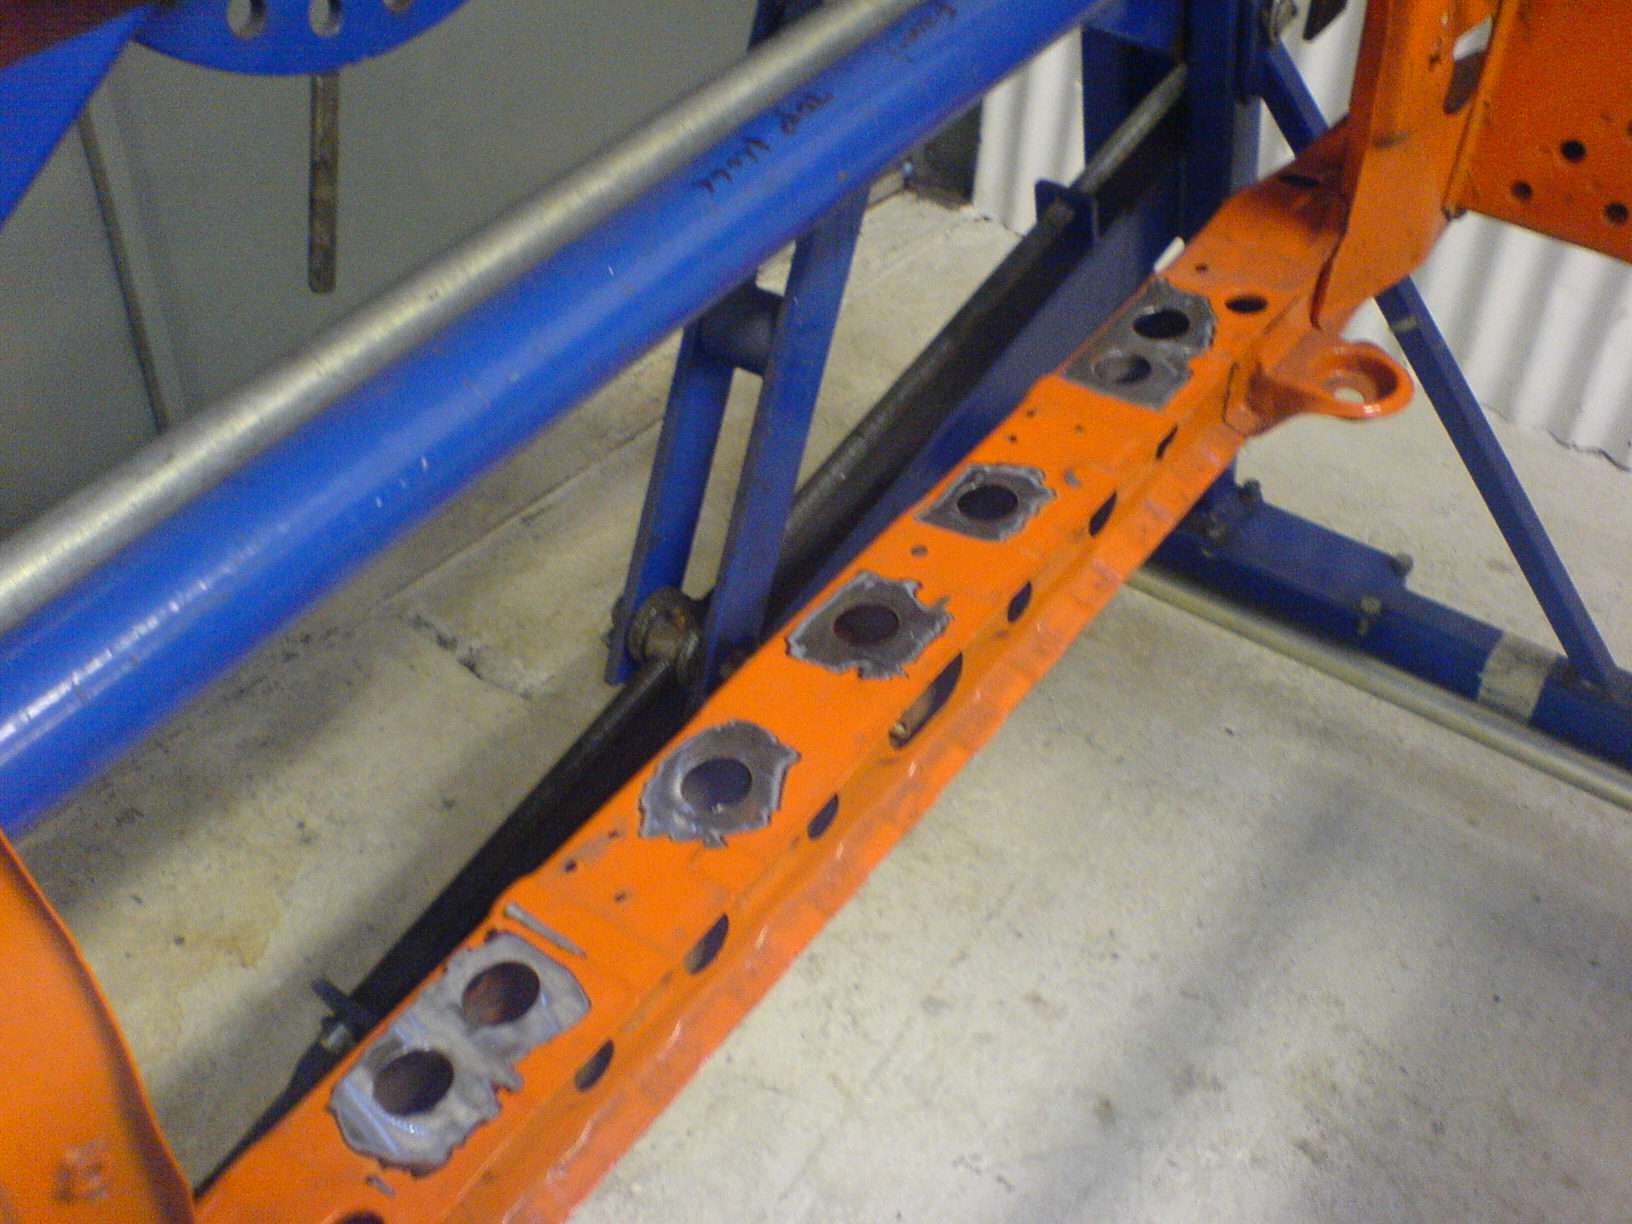
Got a few more pics which I'll post up in a mo and then I'm up to give the car a final going over to make sure we've got everything covered before it goes for paint later in the week.

In reply to some of your posts - BTW don't be offended if I don't reply to yours personally, all comments are really welcomed and I'll always do my best to cover any questions asked.


Dom -
Yeah you certainly can't fault the workmanship that's for sure....but then again I knew that from the start having seen plenty of their "everyday" stuff.
Boot floor is perfect, exactly how we discussed it...in fact it's probably even better :wink:

Dave -
Thanks mate, as I said, it's got a long way to go but I am not going to rush any part of the build. Originally intended to be hitting the track with it later this year for testing and then racing next year but I've decided not to give myself a deadline. If I had unlimited resources then it would be easy to get it finished in less time but each part of the process needs to be budgeted for before I can move on to the next.
I have plenty to get on with already but TBH I've been too busy with customer cars and planning the next stages.
The engine which was fully built and ran well way back at the end of last year is currently fully stripped and back in sealed crates ready for the build back up again. I've had a few more mad ideas which I'm currently exploring before starting the rebuild again though....doubt I'll use them but it's only my time I'm wasting if I don't :lol:
Also got the gearbox build to get done at some point, thankfully that is just a pretty straightforward build - M2F5 with 4.64 final drive and Kazz 1.5way plate diff - may or may not run a cooler on the box as the temps on the old M2B4 were ridiculous during long sessions.


Bri -
Damn right it's strong, the cage is only part of the strength. The way it's being integrated with the shell adds lots to the overall strength of the structure not to mention the sheer amount of seam welding work which has been done too.
Re- RWD and S2k engine.
Whatever engine you decided to run if you were going to go RWD would have been a bucket load of work. Nothing that can't be done of course but again if I had of gone RWD with it I wouldn't have used the S2k F20c for sure.......even though I do just so happen to have one lying around in my workshop :lol: (I'm saving that for my Mk1 Capri project :wink:)

dlongmu -
Yeah I know it's not impossible to run RWD with the H but as a practicality there are many many much better options out there. Regardless of that, the car was realistically always going to stay FWD....after all that's what Preludes are. Think along the lines of a budget Prelude Super Tourer and that's what I'm after 8)

Maxx -
You are kidding right? :lol:
I don't think I've ever seen anybody that's been as thorough with a Prelude as you have with your project. Your attention to detail and insistence on everything being right goes over what most people would even think of. It's all for very different reasons of course but I can see from your thread that you won't accept second best at all 8)


Steve -
Might be able to sort something out with regards to those seat mounts for you. Leave it with me and I'll let you know.


Nathan -
LOL I very nearly almost typed "Here's where Nathan says I told you so" :lol:

To be fair to the guys, they were happy enough to TiG it all if I'd demanded it...we discussed it one evening while I was up with the car and it was basically decided to keep things simple and go with the mighty MiG for the seam work. Little bit heavier but a whole lot easier and of course a fair bit cheaper. Most of it is out of sight anyway but even having said that their standards of welding are still top notch. 8)


Right lets get a few more images up

Rich

User avatar
Buzzonion Vtec
Posts: 214
Joined: Sat Jan 28, 2012 10:29 am
My Generation: 4G

Custom Fabrication roll cage and body prep 4

Post by Buzzonion Vtec » Sun Jan 29, 2012 6:48 pm

Update 7 – Originally Posted - Tue Jul 28, 2009 12:29 am

http://preludeuk.forumup.com/viewtopic. ... =preludeuk


Ok here we go with a few more pics.
No big dramatic items here really, just lots of finishing touches, connecting wraps and ties etc.


Starting where we left of last time.... the Prelude is belly up for the removal of all of the factory seam sealant, underseal and brackets that are no longer required. Once done the inner arches, chassis rails, floor pan joints, sill joints and boot floor were all seam welded.

Image

Image


N/S/R Inner wheel arch

Image


O/S/F Inner wheel arch. Note also the blanking plates welded in place to cover unwanted access holes on the A-pillar

Image


Underside of new boot floor panel and fabricated rear closure panel of chassis cross member.

Image


Full extent of the seam welding can be seen from this pic. Not to mention a serious amount of underseal treatment that had to be removed. Fair play to Honda though...it's quite clear to see how well the floor pan has been protected. The whole underside will be zinc primed and fully painted to protect it from the elements.

Image


New fabricated T45 front strut tower brace in place. Much much stronger than the old cusco type brace that had lived on the car in recent years and super light too.

Image


O/S/F and N/S/F Upper strut tower tubes now fully integrated into the scuttle panel of the body shell. Note that the heater motor intake opening has also been plated up as it will no longer be needed.

Image

Image


The following few pictures show some of the "ties" and "wraps" which have all been fabricated to effectively link all aspects of the cage and bodyshell together. This is done to obviously add further strength but also to spread loads throughout the cage tubework.

Image

Image

Image

Image

Image


Here's the inside view of the boot floor now fully welded into position.

Image

Image


Single skinned floorpan centre tunnel looking much cleaner and now with added gearshifter mounting towers.

Image


Multiskinned bulkhead sections removed and all open unrequired holes plated up.

Image


That's it for now, although I'm sure I'll take some more pics tomorrow when I go up to give the car a final once over before going to the paintshop.
Can't say as I envy the poor buggers who are gonna have to prep and paint the interior ....mind you I've done it before so it is kinda nice to let someone else do it for a change. :lol:

I'll try and get some half decent shots of the completed cage before it goes to paint.


As always, thanks for looking 8)

Rich
Last edited by Buzzonion Vtec on Sun Jan 29, 2012 10:23 pm, edited 1 time in total.

User avatar
Buzzonion Vtec
Posts: 214
Joined: Sat Jan 28, 2012 10:29 am
My Generation: 4G

Re: Thread Building - Please don't reply just yet ;-)

Post by Buzzonion Vtec » Sun Jan 29, 2012 6:49 pm

COMMENTS

dlongmu wrote:Holy crap dare I ask how much that work cost?

Performance Autoworks wrote:You can ask :lol: :lol:

Lets put it this way.... it's not cheap but then again it's nothing like as expensive as it should be.

Bri wrote:All this and a Mk1 Capri project I love Capri's. You are rapidly becoming my Idol. I am not worthy! :lol:

Got a nice Mk3 down the raod X packed up in black, does funny things to me when I look at it :oops:

What awsome work and projects mate. Wish my wallet wasnt so empty. Will have to get down and have a look at your place one day.

Kezz wrote:this is going to be one serious beast, i cant wait until the finished product!! :D

MaDMaXX wrote:Looking like the calm before the storm, so much planning now being completed, i love it :)

I wish i could clean off my underbelly and paint/treat it, it's one thing i don't really have the tools/ramp to do, but it doesn't stop me wishing :)

Looking forward to the next update already.

mercutio wrote:brilliant work matey wont the boot floor flex though being just a flat panel
it looks brilliant though 8)

Hyabusa Hunter wrote:damn that work is ace........ i wish i wish i wish i wish mine come out 10% as good as that has :shock:

.

User avatar
Buzzonion Vtec
Posts: 214
Joined: Sat Jan 28, 2012 10:29 am
My Generation: 4G

Re: Thread Building - Please don't reply just yet ;-)

Post by Buzzonion Vtec » Sun Jan 29, 2012 6:50 pm

REPLY


I'd better get on and respond to some of the previous posts.


Bri -
Ah yes Capris 8) 8)
Was brought up with RWD and have always loved Capris... had a couple
Mint 2.8 inj special and a fully rebuilt 3.2 S track capri
Both Mk3's but always wanted a Mk1 and do something a bit different with it. Me and Kris came up with a plan to build an S2k engined Mk1... So far I've got the motor but not much else... this is very much a future project but it will happen :twisted:

In many ways the Prelude represents a close reletive of the Mk1 capri albeit FWD... I love proper coupes


Dave -
I bet I love it more :lol:
It really is a great feeling to see the progress each visit and to have it turning out far better than I even expected is full testament to Custom Fabrications. They have a certain knack of taking a vision and generally a half decent verbal description of what I want and turning it into something at least one step beyond.

As far as the underside goes, mine obviously needed to be fully removed of the underseal etc as it has been fully seam welded, plus of course the welding work inside the car has an effect. What was found (as can be seen) is that Honda did a fantastic job of their underfloor protection. No rust to speak of anywhere. All I'd suggest to anyone is to simply give the underside a clean of and maybe apply a coat of stone gaurd or spray underseal just to top up the protection.

As we all know, it seems the achillies heel of the 4th gen is the rear arches. This corrosion tends to come from the inside of the car and works it's way out rather than from the external elements. Dampness behind the rear quarter panels leads to moisture getting in between the inner and outer arch skins where Honda didn't do such a good job of protection.

Image

Image


mercutio -
Thanks 8)
The boot floor is plenty strong enough don't you worry about that :wink:
If you look at the panel itself it has got swagged ridges which prevent the flexing that a dead flat panel would suffer from. To be fair... I don't think I'll be loading the boot up with the weekly shopping anymore anyway :wink:


Nathan -
Thanks man, I'm loving it and can't wait to get it back so I can get on with the rest of the build.
Your's will be pretty damn awesome too that's for sure, different purposes, different cars but one things for sure I'd certainly love to have them parked up side by side at a show sometime in the future.... just to show people that the Prelude is far from dead and buried 8)


More pics and updates as and when I get some news from the bodyshop


As always I'd like to say thanks for looking and taking an interest in the project. If you have any questions or comments feel free to post away :D

Rich

User avatar
Buzzonion Vtec
Posts: 214
Joined: Sat Jan 28, 2012 10:29 am
My Generation: 4G

Custom Fabrication roll cage and body prep 5

Post by Buzzonion Vtec » Sun Jan 29, 2012 6:51 pm

Update 8 – Originally Posted - Sat Aug 01, 2009 10:06 am

http://preludeuk.forumup.com/viewtopic. ... =preludeuk


As I type this the car is now sat at the bodyshop that has been arranged by Andy and Simon of Custom Fabrications. The car has been transported there still attached to the spits so that the all the underside can be properly prepped and painted as well as the interior and engine bay.
They will also have to do some work to the passenger rear quarter panel thanks to some last minute additions as you will see from the pics below.


Simon and Andy deep in thought...I'm sure I overheard Simon say "I reckon we're about done"..... I was having none of that so cracked the whip and found some other things I wanted.
I'm sure they hate me now

Image


So I gave them a little list of extra bits to do and left it a few days........

When I got back I found that they'd only gone and blooming finished...or just about anyway


Fuel filler flap....what a pain in the arse that is.... lets get rid of that then

Image


Aero cap recessed into original fuel flap

Image


Fuel flap spot welded to quarter panel. Gap is bonded before being "finished" at the paint shop.

Image


Rear lower window support cut back as far as possible then both skins joined with 20 gauge swaged steel.

Image


Both chassis "shoulders" lightened. Multiple holes cut and top joint seem reduced by half before stitch welding

Image


Front rad support/cross rail drilled

Image


The big gaping unwanted hole from the OEM airbox feed has been plated. Although weight reduction is important so is a clean finish.

Image


Doors back on and roof temporarily held in position

Image


Full frontal of the finished cage complete with all of its ties, gussets and wraps

Image


Roof temporarily fitted, gives an idea of the closed cockpit feel.

Image


B-Pillar gusset in place - Not strictly necessary but I'll take any additional strength I can get, plus it adds a certain finishing touch I think.

Image


Full view of finished cage through the passenger door. I'm feeling safer already

Image


Roof off again to get some last shots of the finished build.

Image

Image


Last full overhead shot of the roofless caged Prelude

Image


The last time (hopefully) I'll ever get to see this. Main hoop to roof frame tie. Even the bits you'll never see are carried out to perfection.

Image

Image


Nothing more to do here...other than refit the roof !!

Image


Careful positioning of the roof. The front and rear edges are spot welded but the two sides are bonded using a powerful 3M adhesive.

Image

Image


That's it....job done....once the glue is dry anyway

Image


At this point I heard Andy say "Now are we done?"
The answer to that was "pretty much yes....although...hmmmmmmmm I've got an idea"

To be continued.............


Oh and just one last random shot of the ever growing pile of discarded Prelude...kind wish I had kept all the piles of metal I've ever removed from the car...now that would be impressive. Might have to do a compilation of pics when I get a minute or two

Image


Bodyshop reckon one and half to two weeks (working around other stuff to reduce costs again).... can't bloody wait to see it all in paint again now


Cheers
Rich
Last edited by Buzzonion Vtec on Sun Jan 29, 2012 10:25 pm, edited 1 time in total.

User avatar
Buzzonion Vtec
Posts: 214
Joined: Sat Jan 28, 2012 10:29 am
My Generation: 4G

Re: Thread Building - Please don't reply just yet ;-)

Post by Buzzonion Vtec » Sun Jan 29, 2012 6:51 pm

COMMENTS

MaDMaXX wrote:Once i get a bit further with mine, i'll try and get it on some mans ramps ;) and inspect the underside. I know there is rust under there, just not sure how impregnated it is.
I don't suppose it matters much on yours now due to the lack of an inner skin for the rear arches, but i've spray a ton of cavity wax into mine, i checked they were clean first, amazingly they were, then just leant on the trigger :)

You still going for orange on the outside, was it white inside did you decide in the end?
I just love it when people do things like going that little bit further, not because they're asked to or because they think it will look good on them, but because they can see *why* it's been asked for and want it to be the best they can do of that request :)


Looking forward as always.

User avatar
Buzzonion Vtec
Posts: 214
Joined: Sat Jan 28, 2012 10:29 am
My Generation: 4G

Re: Thread Building - Please don't reply just yet ;-)

Post by Buzzonion Vtec » Sun Jan 29, 2012 6:52 pm

REPLY


Dave -

Yeah would be a good idea to give yours a good going over on the underside before you start using it as a daily driver again. At this stage it'll be nice and dry so no danger of sealing in any moisture. I'm sure you've got one of those "magic" Bilt Hamber products in mind when you tackle the job :D
TBH even the worst neglected examples of Ludes I've seen have only ever had surface rust on the underside...certainly never rotten as such, so a bit of treatment and then the protection to any areas should be all you need to do.

My inner arches have been pretty much open to "breath" for some time but if I'd looked at it properly a number of years ago I'd most definately have fired a load of waxoil or similar into the joins.

Definately sticking with orange outside and although the roof paintwork has not been damaged it is being repainted gloss black (all will become clear soon :wink:).
The interior, engine bay and underside are all going to be one colour.... it's a neutral colour but I'm going to leave it a surprise for now :D


.

User avatar
Buzzonion Vtec
Posts: 214
Joined: Sat Jan 28, 2012 10:29 am
My Generation: 4G

Re: Thread Building - Please don't reply just yet ;-)

Post by Buzzonion Vtec » Sun Jan 29, 2012 6:53 pm

COMMENTS

MaDMaXX wrote:I know the underside of mine is curiously rusty, but it's good to know i still shouldn't have too much work there as it's a daunting thought when i don't know exactly what i'm facing.

I'm intrigued by this clear black you're going to use ;)

But the most interesting has to be the neutral interior, i'm thinking something like a mauve or an off white? maybe some subtle up lighting for the dark winter evenings?

paul bristol uk wrote:Nice Chintz loose covers on the seats with fringes would set it off a treat! :lol:

TopPrelude wrote:This Lude will decimate all, it really looks like a proper serious track car. Love reading this thread, nice pics too.

whisky_ed wrote:I don't think I'll get bored of saying - wow. :shock:

Why did you glue the sides of the roof back on?

dlongmu wrote:
TopPrelude wrote:This Lude will decimate all..
Only after we pump 15g's into it with overnight parts from Japan

I'll get my coat
.

User avatar
Buzzonion Vtec
Posts: 214
Joined: Sat Jan 28, 2012 10:29 am
My Generation: 4G

Re: Thread Building - Please don't reply just yet ;-)

Post by Buzzonion Vtec » Sun Jan 29, 2012 6:54 pm

REPLY


Sorry to disappoint... no further updates from the body shop yet :(
TBH I wasn't really expecting too much just yet, they are after all working on it "around" other jobs to keep costs to a minimum...all part of a special understanding 8)

So I'll just tackle a couple of replies.....


Top Prelude -
I love your confidence :lol: ... alas for it to decimate all it needs to be driven properly and unfortunately I have become a little on the rusty side :oops: .
Never fear though..... upsetting people with a fast Lude on track is like riding a bike... you never forget...it might just take a lap or two to get back in the swing of things :lol:

Glad you're enjoying the thread 8)


whiskey_ed -
Thanks 8)
The roof is no longer a structural part of the car so in fairness if I wanted it to be roofless I could have. The original roof fitment it spot welds all round (and plenty of them), but this really is not necessary now. Front and rear edges were spot welded as much as anything to keep the roof perfectly positioned while the bonding down the sides cured. The bond used is widely used in motorsport for refitting roofs whether they are steel, fiberglass or carbon fibre....also acts as a weather sealant.


dlongmu -
No need for you to get your coat...I'll pass it to you :P
Wish I had 15g's to throw at it.... it'd probably be ready by October if I did !!
You may not think it but I am on as tight a budget as pretty much anyone else here... I'm sacrificing more things than I care to think of, selling stuff I never wanted to part with and working more hours than any doctor would consider healthy :shock:
To me though... the desire to see this project through is everything........ now who wants to buy a kidney?
One less than careful owner and no service history whatsoever :arrow:


Thanks
Rich

User avatar
Buzzonion Vtec
Posts: 214
Joined: Sat Jan 28, 2012 10:29 am
My Generation: 4G

Re: Thread Building - Please don't reply just yet ;-)

Post by Buzzonion Vtec » Sun Jan 29, 2012 6:54 pm

COMMENTS

MaDMaXX wrote:Let us never say you're not committed, it's a valiant project you're in the middle of here, saving something for the good of internal combustion :)

Chuffter wrote:
Sorry to disappoint... no further updates from the body shop yet
Dude a build like this takes alot of time; don't worry if you can't update every day, week, month whatever. Stay committed to the cause and you will have one hell of a lude!!!!!! 8) :D

People will wait for updates is what I'm trying to say

Buzzonion Vtec wrote:Thanks guys... as I've said before... I'm gonna be counting on you lot to keep the moral up during some of the slower periods of the project.

Sometimes there's plenty going on in the background so to speak but nothing really to show for it... those are what I consider the tough times. Hours of research and development can sometimes end up with nothing more to show for it than a useless item and another missed meal - been there enough times believe me :roll:

Anyway, just really wanted to say thanks for the support 8)

paul bristol uk wrote:I for one am willing you on,its an amazing project. I have the utmost respect for you and your dedication to it.

Dino wrote:
Buzzonion Vtec wrote: Anyway, just really wanted to say thanks for the support 8)
Youre welcome. :lol:

Buzzonion Vtec wrote:
Dino wrote:Youre welcome. :lol:
There are always exceptions to the rule :P :lol:

mercutio wrote:i love this thrad its like watching your kids grow up 8) :lol:

Greeny_23 wrote:^^^^ what mercutio said defo like watching ya kids grow up. well done mate u have lots! of support here! keep it goin n keep ya chin up itll be worth it when its done! :D

Post Reply

Return to “Lude Profiles”