
Merlin wrote:http://www.ebay.co.uk/itm/14pc-1-2-Driv ... SwNSxU92TInewkid wrote:retaining screws on the discs can be a pain tho
Congratulations to vtecmec for winning May/June's Lude Of The Month, with his DIY Turbo BB1 build.
>>> Click Here For Profile <<<

>>> Click Here For Profile <<<
Replacing discs
-
wurlycorner

- Ye are glad to be dead, RIGHT?
- Posts: 21511
- Joined: Sat May 19, 2012 3:33 pm
- My Generation: 4G
- Location: Chelmsford, Essex
- Has thanked: 2507 times
- Been thanked: 317 times
-
Merlin

- Moderator
- Posts: 12397
- Joined: Fri Aug 06, 2010 9:04 am
- My Generation: 5G
- PSN GamerTag: Merlinbadman
- Location: Edinburgh
- Has thanked: 71 times
- Been thanked: 306 times
You must be good with a screwdriver if you and get the front piston back innewkid wrote:ScrewdriverMerlin wrote:Make sure you have a way of pushing the caliper piston back in, a caliper winding tool, a large adjustable set of pliers or a big G-clampOther than that should should be fine with regular tools.

-
newkid
- Supporter 2016
- Posts: 2665
- Joined: Thu Feb 23, 2012 8:28 pm
- My Generation: 4G
- PSN GamerTag: spaz_ma_taz
- Location: Edinburgh
- Has thanked: 13 times
- Been thanked: 50 times
Merlin wrote:You must be good with a screwdriver if you and get the front piston back innewkid wrote:ScrewdriverMerlin wrote:Make sure you have a way of pushing the caliper piston back in, a caliper winding tool, a large adjustable set of pliers or a big G-clampYeah a big flat head is sometimes good for the rears.
-
vanzep
- Supporter 2016
- Posts: 7178
- Joined: Sun Jan 29, 2012 6:38 pm
- My Generation: 4G
- Location: Edinburgh
- Has thanked: 314 times
- Been thanked: 526 times
If i remember right its just use a flat blade as a pry bar between the carrier and the piston
TBH G clamp is easier tho
TBH G clamp is easier tho
1996-2000 1993 EG9 Blue Civic 1.6 Vti - Traded in against the BB4
2000-2019 1994 2WS BB4 Milano Red JDM Prelude Si VTEC LSD
2015 on > 1991 4WS BB1 Phantom Pearl Grey JDM Prelude Si VTEC LSD
2021 ON > 1998 2WS BB6 White Pearl JDM Prelude Si VTEC
2000-2019 1994 2WS BB4 Milano Red JDM Prelude Si VTEC LSD
2015 on > 1991 4WS BB1 Phantom Pearl Grey JDM Prelude Si VTEC LSD
2021 ON > 1998 2WS BB6 White Pearl JDM Prelude Si VTEC
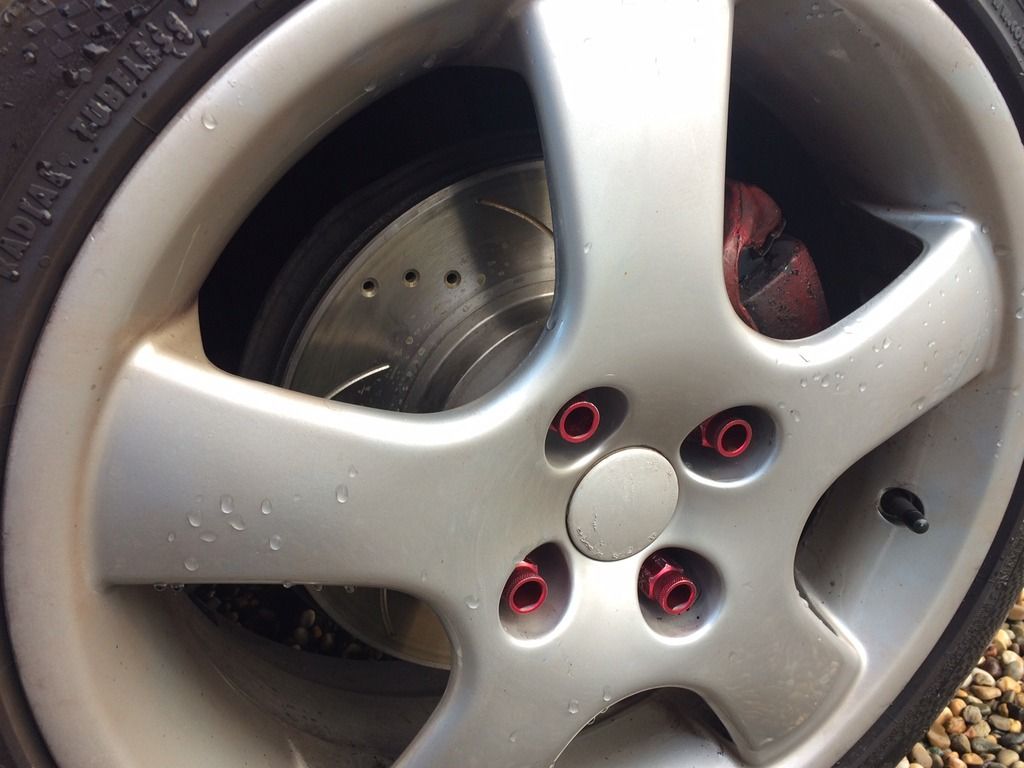
Yesterday I replaced the rear discs and pads. The near side rear disc looked pitted and a little rusty, I discovered why!
The pins that connect the calliper to the carrier had seized, which I guess meant that only the inner pad was doing anything.
It was a bugger to free up, I removed the whole assy from the car and worked on it in the bench. Eventually after lots of pulling and twisting the pins popped out. I cleaned them off with alcohol, and the holes, regreased it all and reassembled so that they slid freely.
Reassembly was ok, except that it was difficult to get the piston lined up properly so the little spigot on the pad lined up with the cross shaped recess on the piston. Why is the rear like that, but the front pistons hollow?
The offside calliper carrier wasn't seized, but was a bit stiff, so I reconditioned it anyway.
The first side I did took 2 hours, the other side 30 mins!
---------------------
'96 BB4.
'96 BB4.
-
indigolemon

- The Chaos Engine
- Posts: 6682
- Joined: Wed Jun 30, 2010 1:45 pm
- My Generation: 4G
- PSN GamerTag: M149YSL
- Location: Kelty, Fife
- Has thanked: 24 times
- Been thanked: 71 times
- Contact:
The rear pistons are both hydraulically and mechanically operated, as they contain the handbrake mechanism. The pistons need to be wound back in - forcing them straight back can potentially damage the handbrake mech.
'On two occasions I have been asked, 'Pray, Mr. Babbage, if you put into the machine wrong figures, will the right answers come out?' I am not able rightly to apprehend the kind of confusion of ideas that could provoke such a question.' - Charles Babbage