
Congratulations to vtecmec for winning May/June's Lude Of The Month, with his DIY Turbo BB1 build.
>>> Click Here For Profile <<<

>>> Click Here For Profile <<<
The 'look at what I did today' thread
-
mercutio

- LotM Winner
- Posts: 14958
- Joined: Sun Aug 08, 2010 8:45 pm
- My Generation: 5G
- Location: Sunny Manchester
- Has thanked: 1 time
- Been thanked: 4 times
- Contact:
cool  just got to hope the guy doesnt say ok had enough get your stuff out
bristol_bb4 wrote:ahhh a 5th gen, i love 5th gens
Dino wrote:I loves the 5th gen really.... just dont quote me on it...
4thgenphil wrote:Mines 4 1/4 unches mate, sorry
http://www.ludegeneration.co.uk/profile ... -t618.html
-
jjmartin349571
- Supporter 2016
- Posts: 3344
- Joined: Fri Feb 10, 2012 12:41 am
- My Generation: 4G
- XBOX GamerTag: jjm349571
- Location: Newhaven, East Sussex
- Contact:
Today I went and picked up a Toyota Granvia which had just arrived at Southampton

It's probably not going to do it for many of you guys, but it's actually really nice to drive. I just did two hours on the motorway and the V6 combined with the auto box make it a really nice place to be. Corners are interesting though

It's probably not going to do it for many of you guys, but it's actually really nice to drive. I just did two hours on the motorway and the V6 combined with the auto box make it a really nice place to be. Corners are interesting though
-
jjmartin349571
- Supporter 2016
- Posts: 3344
- Joined: Fri Feb 10, 2012 12:41 am
- My Generation: 4G
- XBOX GamerTag: jjm349571
- Location: Newhaven, East Sussex
- Contact:
The way my day was going I could've done with a cuppa!! I was meant to be back home by 1pm, I got home eventually at 7:30pm thanks to a bit of drama early in the day with the garage who replaced the tyre on my Isuzu:prelude91 wrote:You could've popped in for a cuppa, always welcome.

They managed to strip 4 studs out of 6 whilst removing/refitting the wheel, that photo is midway through them bodging it back together after doing the damage. I've checked the work since and I'm not happy with it, I don't know how some of the nuts are holding on still as there must be about 2 threads of the nut left holding the stud
That said I took my Granvia to Tyreland in Southampton straight after picking it up, and they couldn't have been more helpful/professional - they even looked over the Isuzu for me to inspect the other garage's repair whilst they fitted tyres to the Granvia, little gestures like that go a long way in my book!
At any rate I'll let you know in advance next time I'm due to be in the area mate, would be good to put a face to a name
-
wurlycorner

- Ye are glad to be dead, RIGHT?
- Posts: 21511
- Joined: Sat May 19, 2012 3:33 pm
- My Generation: 4G
- Location: Chelmsford, Essex
- Has thanked: 2507 times
- Been thanked: 317 times
-
jjmartin349571
- Supporter 2016
- Posts: 3344
- Joined: Fri Feb 10, 2012 12:41 am
- My Generation: 4G
- XBOX GamerTag: jjm349571
- Location: Newhaven, East Sussex
- Contact:
Two wheel nuts were cross threaded from last time they had it, they stripped the thread coming off. They then tried to put the wheel back on anyway with the windy gun and drokked two more studs.
I wouldn't let them touch it again even if they were working for free. I'll replace the studs myself using parts from my breaker for the time being. They're easy enough to knock out and refit.
I wouldn't let them touch it again even if they were working for free. I'll replace the studs myself using parts from my breaker for the time being. They're easy enough to knock out and refit.
-
CARRisma

- Posts: 902
- Joined: Tue May 01, 2012 11:30 am
- My Generation: 5G
- Location: Horley, Surrey
- Has thanked: 20 times
- Been thanked: 38 times
- Contact:
Yesterday and this morning, I gave the rear wall of the boot a 2 coats of underseal (Bilt Hamber Dynax-UB). Previously, I have already done both front and rear wheel arches, underneath the booth and behind the front bumper. Anyhow, while the rear bumper was off, I thought I'd tackle the minor water leak visible in the boot. I had already sealed both side air vents by removing them, holding up a bin liner to the hole, then reinserting the vents, making them air tight. Simples. I had also already sealed the fuel tank inspection cover thingy underneath the rear seat, so I suspect the leak may be coming from the rear lights.
They both have a foam seal of about 5mm thick. Rather than replacing both, I decided to augment them with a thin sheet of black foam. This was purchased from Hobbycraft and the sheets measure 45x30cm each and are only about 1-2mm thick. I simply cut the foam sheet to shape with a craft knife using the original foam seal as a stencil. I had originally planned to use two layers on either side of the original foam seal but discovered that it ends up too thick so the rear lights stick out too far afterwards. So instead I just used one layer, between the original seal and the car. Time will tell if it's done the job successfully. It's possible to make 2 new seals with just one sheet if anyone is interested in doing this. Also, I now have two spare going free to anyone who wants them?

Original foam seal (top) and new Hobbycraft foam seal.

Original seal fitted with new seal.
They both have a foam seal of about 5mm thick. Rather than replacing both, I decided to augment them with a thin sheet of black foam. This was purchased from Hobbycraft and the sheets measure 45x30cm each and are only about 1-2mm thick. I simply cut the foam sheet to shape with a craft knife using the original foam seal as a stencil. I had originally planned to use two layers on either side of the original foam seal but discovered that it ends up too thick so the rear lights stick out too far afterwards. So instead I just used one layer, between the original seal and the car. Time will tell if it's done the job successfully. It's possible to make 2 new seals with just one sheet if anyone is interested in doing this. Also, I now have two spare going free to anyone who wants them?
Original foam seal (top) and new Hobbycraft foam seal.
Original seal fitted with new seal.
2000 Honda Prelude 2.2 VTi (H22A8 / BB8).

-
wurlycorner
- Ye are glad to be dead, RIGHT?
- Posts: 21511
- Joined: Sat May 19, 2012 3:33 pm
- My Generation: 4G
- Location: Chelmsford, Essex
- Has thanked: 2507 times
- Been thanked: 317 times
Nice work on the gaskets.
I'm not sure that blocking up the air vents is a good idea though - they're there to equalise ensure that air passes through the car, to avoid things like condensation (and to help the efficiency of the ventilation fan).
They should have already had a one-way flap on them, so air could only be drawn out, not crap in?
--
Iain.
Iain.
Super Secret 1G (not really super secret!)
-
CARRisma
- Posts: 902
- Joined: Tue May 01, 2012 11:30 am
- My Generation: 5G
- Location: Horley, Surrey
- Has thanked: 20 times
- Been thanked: 38 times
- Contact:
Re: The 'look at what I did today' thread
Yeah I agree, they must be there for a valid reason but I sealed them years ago and haven't had any problems with condensation. They've got flaps on but aren't 100% effective.wurlycorner wrote:Nice work on the gaskets.
I'm not sure that blocking up the air vents is a good idea though - they're there to equalise ensure that air passes through the car, to avoid things like condensation (and to help the efficiency of the ventilation fan).
They should have already had a one-way flap on them, so air could only be drawn out, not crap in?
2000 Honda Prelude 2.2 VTi (H22A8 / BB8).
-
jjmartin349571
- Supporter 2016
- Posts: 3344
- Joined: Fri Feb 10, 2012 12:41 am
- My Generation: 4G
- XBOX GamerTag: jjm349571
- Location: Newhaven, East Sussex
- Contact:
I had a bit of a car washing frenzy yesterday.
First up was the Granvia:


Just need to find some tape adhesive remover for the glass now, my mate reckons he has some in his workshop so I can hopefully get that sorted tomorrow.
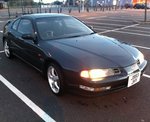
Next up was the Accord as I noticed it was getting a bit dusty from being parked up so it got a wash too albeit just snow foam and a pressure wash, still came up nicely:

Again, tape adhesive needs removing from all the crap the shipping line stick in the window.
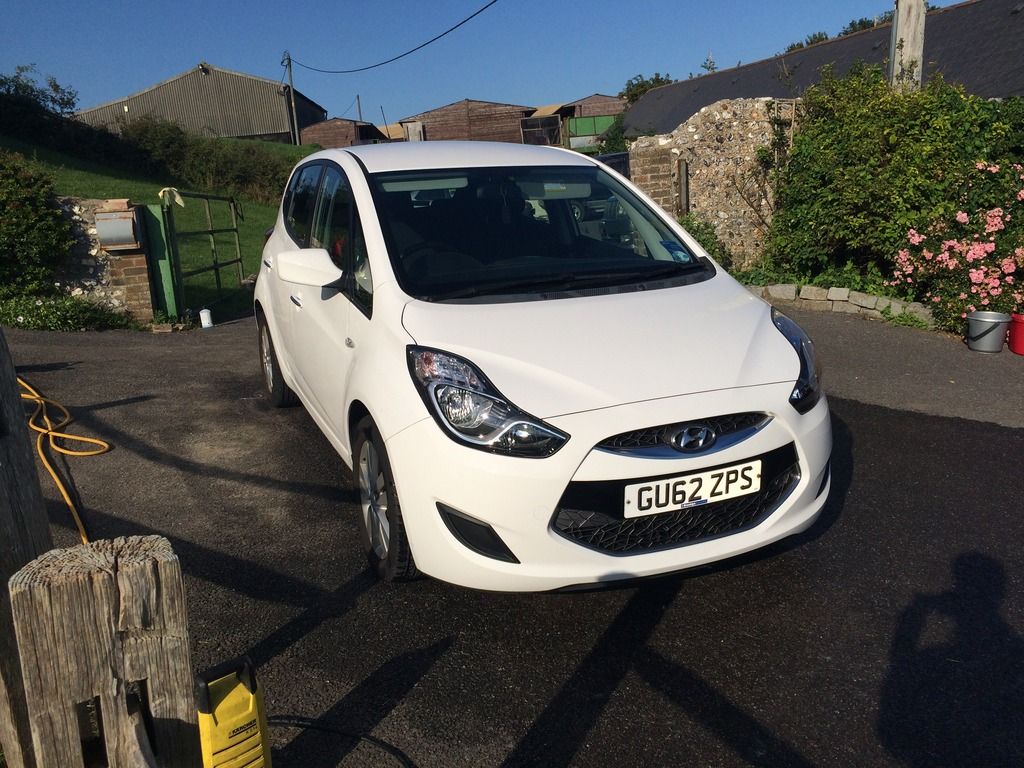
Then my Nan spotted I was washing cars so asked me to sort out hers - you can probably tell from the pic it was the last wash of the day! Again it just got snow foam and a pressure wash, it really needs going over with a wash mit though to get the stubborn marks off.
That was enough for one day! Still got so many more cars that need a wash though
Next on the to-do list is fog lamp wiring, I picked up some diodes today and I'm going to attempt an OEM looking set up on both cars. As the Accord has 4 rear tail/brake lights and the Granvia has 6, I'm going to use diodes to wire in a feed from a fog switch which will override the innermost pair of brake lights and utilise them as fog lamps when required. With the switch off they should still function as brake lights
First up was the Granvia:


Just need to find some tape adhesive remover for the glass now, my mate reckons he has some in his workshop so I can hopefully get that sorted tomorrow.
Next up was the Accord as I noticed it was getting a bit dusty from being parked up so it got a wash too albeit just snow foam and a pressure wash, still came up nicely:

Again, tape adhesive needs removing from all the crap the shipping line stick in the window.
Then my Nan spotted I was washing cars so asked me to sort out hers - you can probably tell from the pic it was the last wash of the day! Again it just got snow foam and a pressure wash, it really needs going over with a wash mit though to get the stubborn marks off.

That was enough for one day! Still got so many more cars that need a wash though
Next on the to-do list is fog lamp wiring, I picked up some diodes today and I'm going to attempt an OEM looking set up on both cars. As the Accord has 4 rear tail/brake lights and the Granvia has 6, I'm going to use diodes to wire in a feed from a fog switch which will override the innermost pair of brake lights and utilise them as fog lamps when required. With the switch off they should still function as brake lights