

I thought I had a bad weekend with having a sore neck (unfortunately been a common occurrence since suffering whiplash many years ago) and one of my snakes dying yesterday, but yours certainly tops that!
Good luck with getting the house and the ludes sorted.
Congratulations to vtecmec for winning May/June's Lude Of The Month, with his DIY Turbo BB1 build.
>>> Click Here For Profile <<<

>>> Click Here For Profile <<<
A Bad Weekend... (Not really lude related, LONG+pic heavy)

-
ddoubledanny

- LotM Winner
- Posts: 1016
- Joined: Fri Jan 27, 2012 8:24 pm
- My Generation: 4G
- PSN GamerTag: Ddoubledanny
- Location: Kettering
-
wurlycorner

- Ye are glad to be dead, RIGHT?
- Posts: 21511
- Joined: Sat May 19, 2012 3:33 pm
- My Generation: 4G
- Location: Chelmsford, Essex
- Has thanked: 2507 times
- Been thanked: 317 times

-
wurlycorner
- Ye are glad to be dead, RIGHT?
- Posts: 21511
- Joined: Sat May 19, 2012 3:33 pm
- My Generation: 4G
- Location: Chelmsford, Essex
- Has thanked: 2507 times
- Been thanked: 317 times
Re: A Bad Weekend... (only slightly lude related and pic hea
Well I thought I'd update this with how I fixed the house, in case anyone's interested/it might be of use to people in the future... (LOTS of pics below)
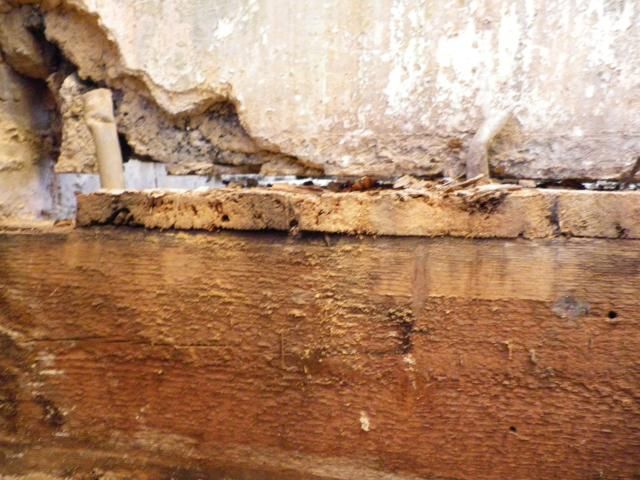
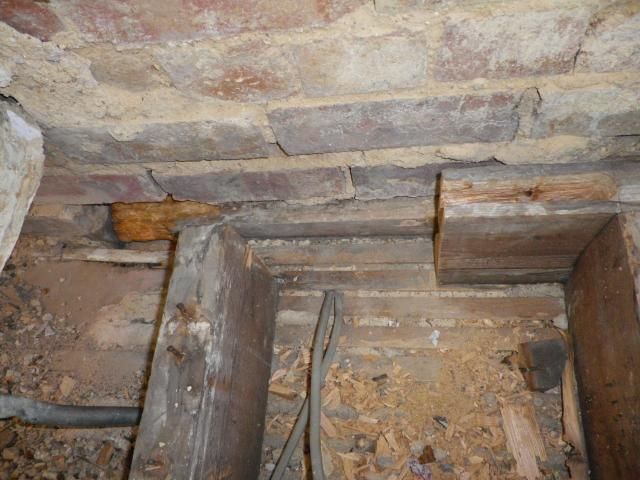
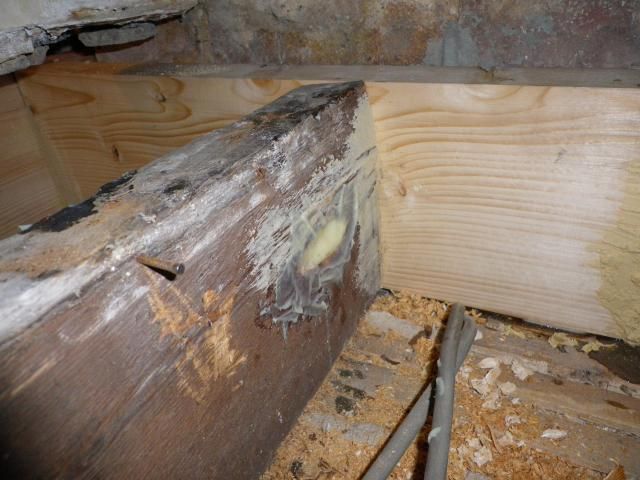
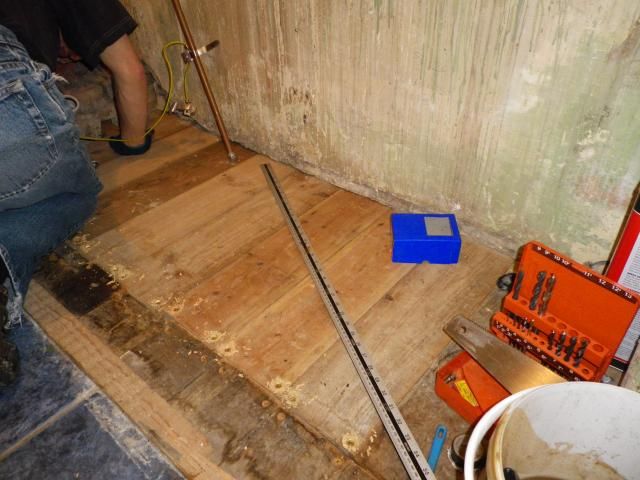
So after poking about to remove all the loose rotten stuff and clear the mounds of debris around the joists left by previous crap builders this gives a bit of a better idea of how far the rot had gone
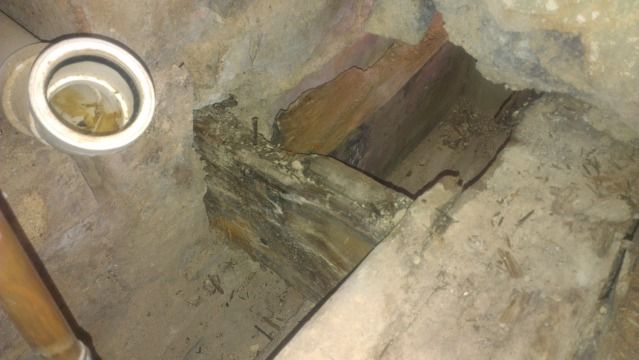
(The number of rotten floor boards actually continue further right out of this picture)
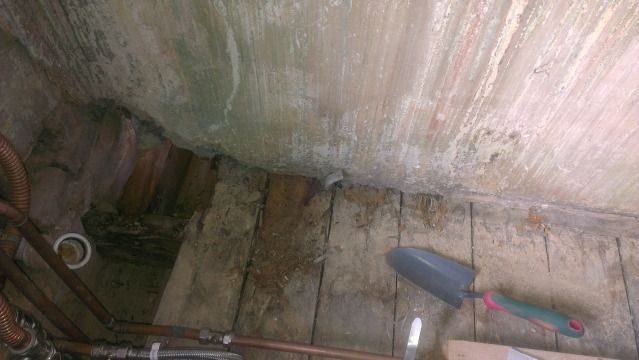
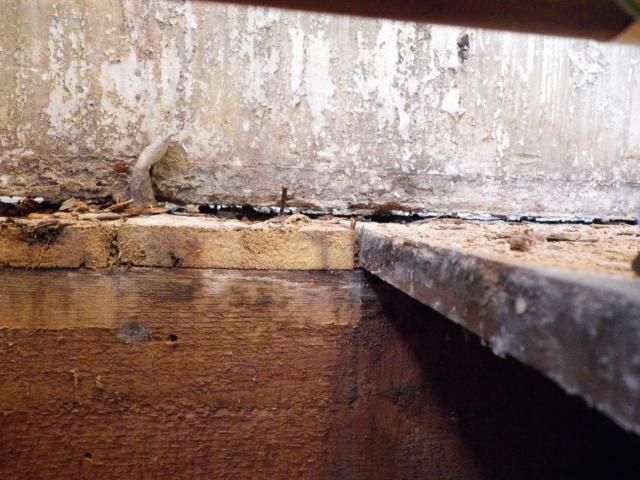
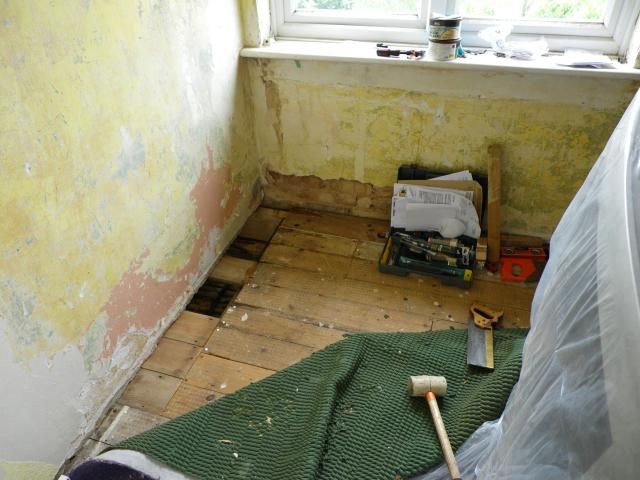
Started chopping out the floor boards to get a better view while still leaving them in place under the wall for now - that internal block work wall isn't tied in to the external brick wall
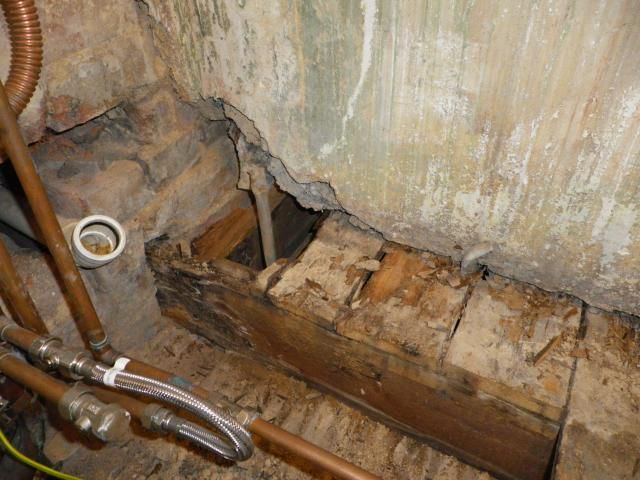
You can see the joist had dropped in the wall socket as well as badly rotted away at the top.
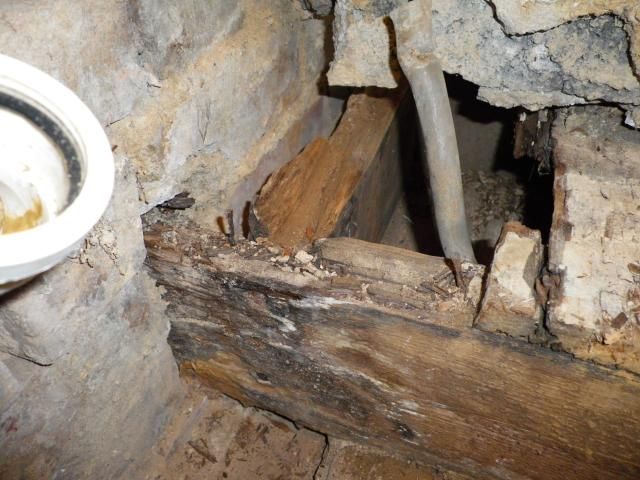
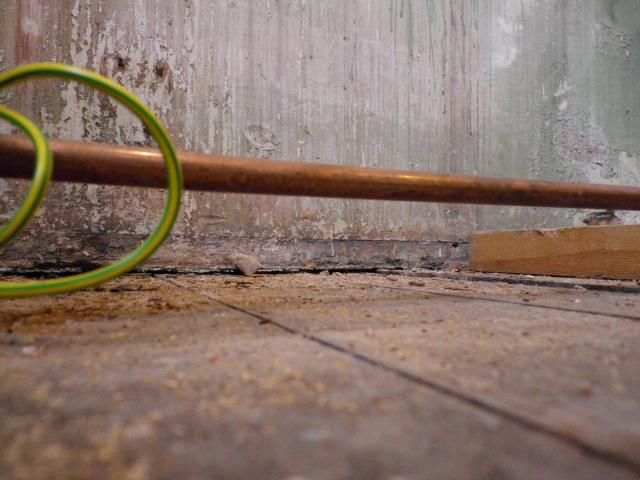
And the floor had dropped away from the wall it's supposed to be holding up!
(About 2/3rds of the way along the wall :roll)
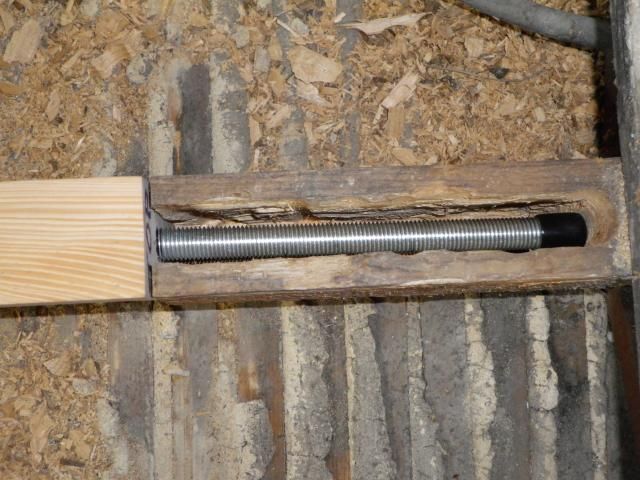
This is the basics of the repair kit I'd ordered. The length on the left goes into the wall and I'll cut to suit, the outer ends with the rods go into the good bits left of the existing joists.
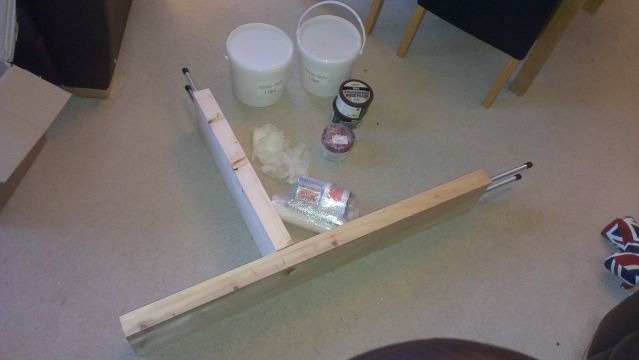
It includes pouring resin kits (the 2 big tubs), an injecting resin kit (wrapped in the polythene), proper rot treatment/protector stuff, gloves, wood filler and the new joist sections.
I could have just bought timber locally and drilled/inserted the rods myself to save money, but the old joists don't match modern timber sizes, so doing it this way meant they planed the new joist sections to exactly match (plus at least I know one half of the splice joints has been done by someone that knew what they were doing )
)
Total cost of that lot ordered over e-mail/the phone to drawings I sent them; £295.68 inc VAT!
So onto getting ready to put the new joists in. First job, support the ends of the joists/beam that will be left in.

Yes, that meant dismantling the kitchen; washing machine out, sink out, cut out the bottom of the cupboard under that so the acro stand could reach the floor and move the fridge into the living room

I managed to get the washing machine back in, at an angle so at least that was still usable.
Back upstairs, I decided since the wall was sort of hanging there anyway I'd just remove the floorboards under it as far as I needed and hope it didn't fall down (up until I discovered the floor had dropped away from the wall, I did have a method of supporting the wall while removing the floor worked out after speaking to that company, but this saved a lot of time/arsing about). Calculated risk
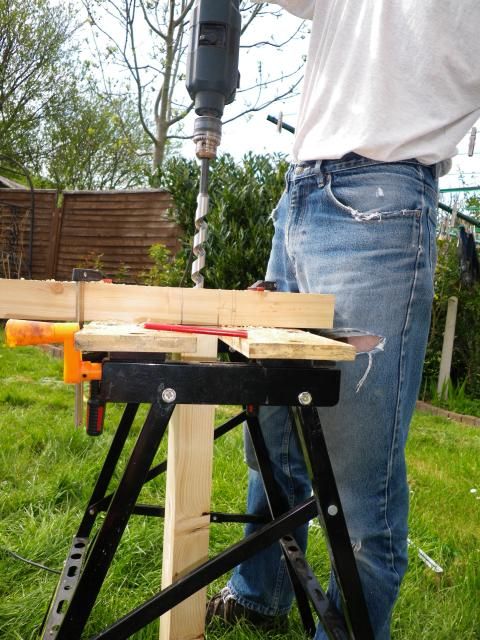
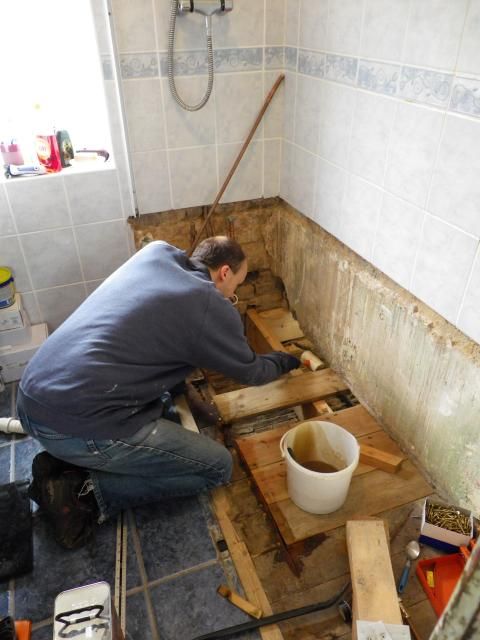
Then drill a 'slot' in the old joist. Have to be very careful not to split the joist (that's why you drill before cutting the rotten end off) or drill too deep/wonky so it retains enough strength and isn't too deep for the pre-determined amount of resin in the kit.
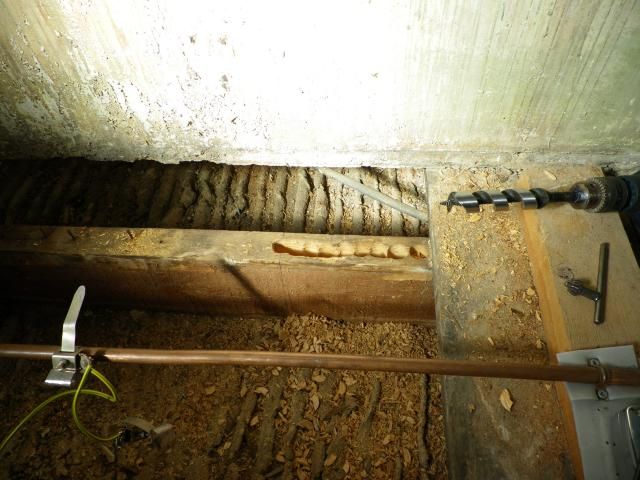
I used an arguer drill bit - much faster than a flat wood bit and also removes the chipping. BOY are they aggressive on the end of a power drill though!!!
Cleaned up the edges of the slot a bit with a chisel, then clamped some guides in place so I could cut the end off properly square
Cutting it took bloody ages and sods law, of course where I'd chosen to the cut went right down onto a nail holding the lath on below, so I had to swap back/forth with a hacksaw at the end
Scary stuff!
A lot of yanking upwards later to get it away from the nails in the laths and;
FREEDOM!!!

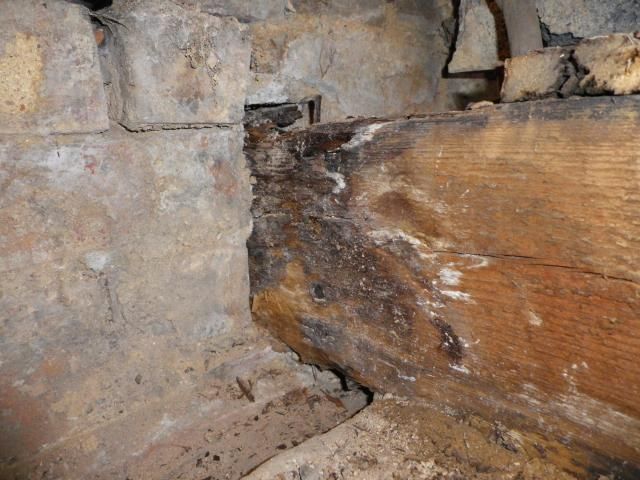
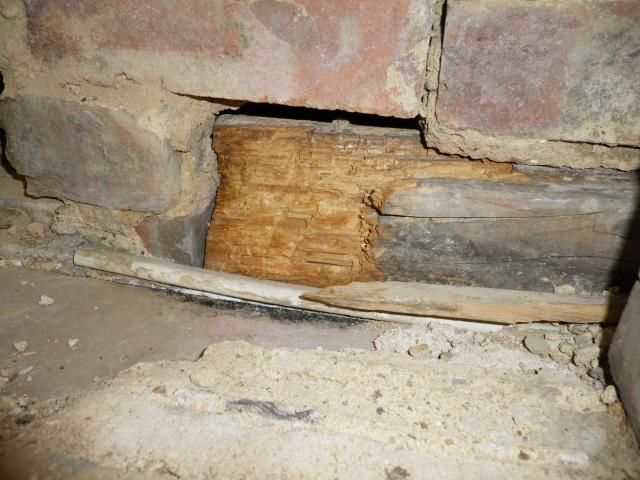
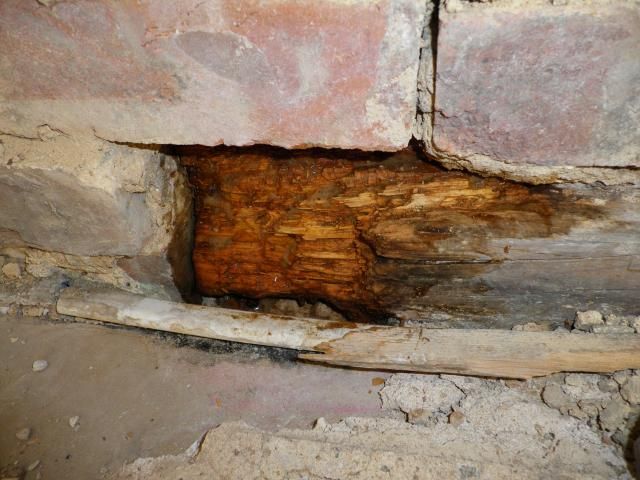
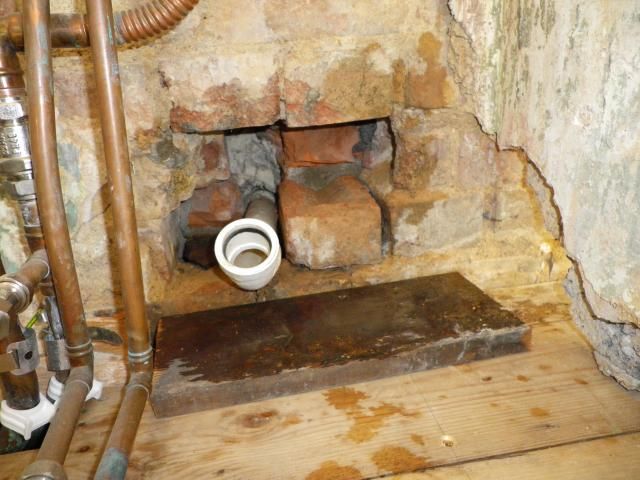
Pulling it away from the end of the beam showed more how rotted it was
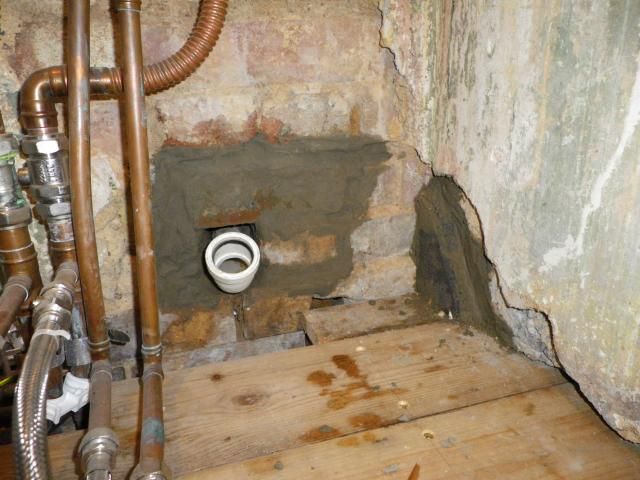
Once out I also discovered the builders hadn't done the brickwork right, where the joist sits on it - it should ideally sit on a flat pad stone, or at the very least with the brick upturned so it has a properly flat surface. But no, they'd left it with the brick recess side up, so the joist had point loading I couldn't do anything about that, so at least I filled in the void with mortar to make it a full flat load bearing surface.
New one offered up into position to test


Then repeat the process in the bedroom to remove the beam - this was much, much more of an arse to do, because the space was even more constrained and the adjacent joist joints. And once the old one was out, I discovered yet another nasty - the wooden lintel over the kitchen window looked dodgy and when I poked around on it, that had also been rotted by the water 
To be honest I'd properly had enough of all this by then and really didn't fancy propping the inner and outer cavity walls, then removing bricks from the outer wall so I could replace the lintel!!!
By my reckoning it didn't really carry much weight, there was still a lot of it there and I probably plan to extend the kitchen outwards through that wall at some point, which would mean the lintel coming out and being replaced by an RSJ anyway, so I decided to just hack out all the rotten stuff and properly rot treat it;
I also then repaired the mortar around those bricks and between the brick and the lintel (didn't take pics)
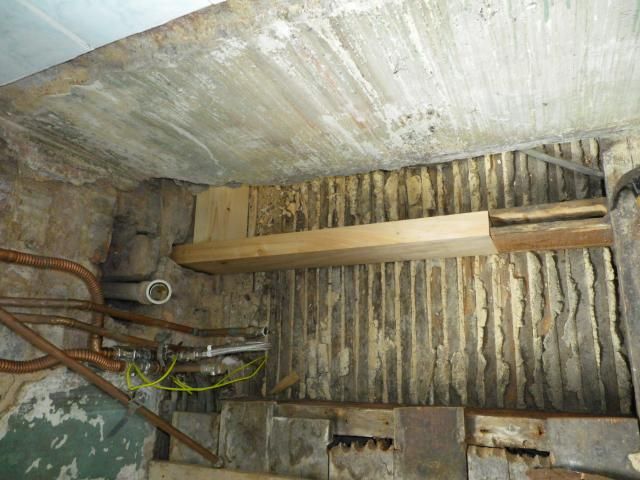
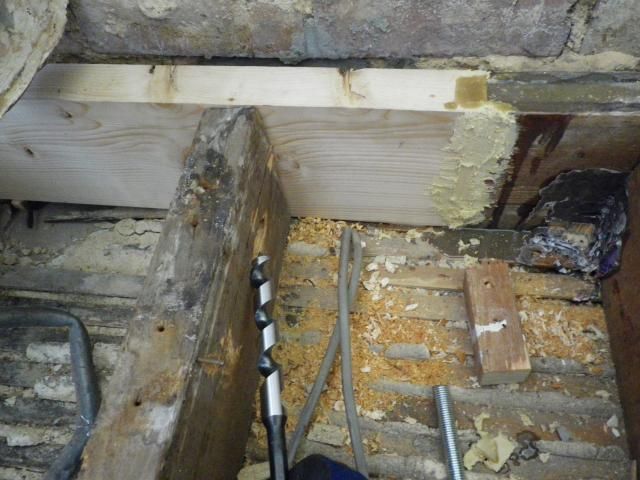
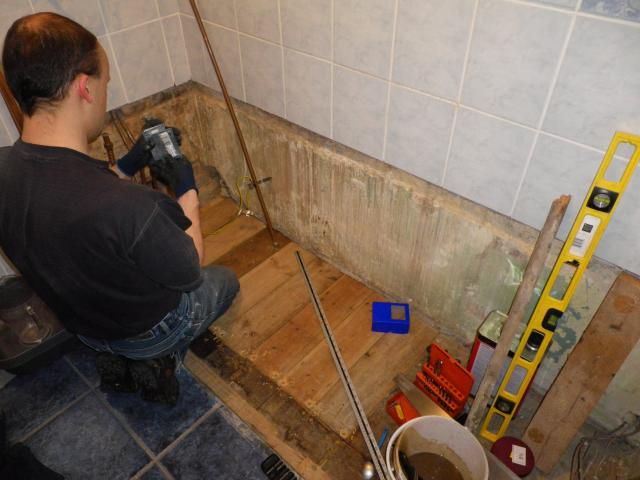
New beam offered up into position.
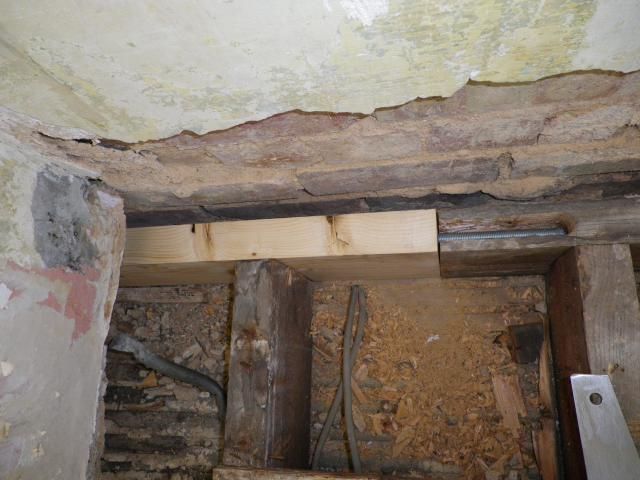
And the other end in the bathroom
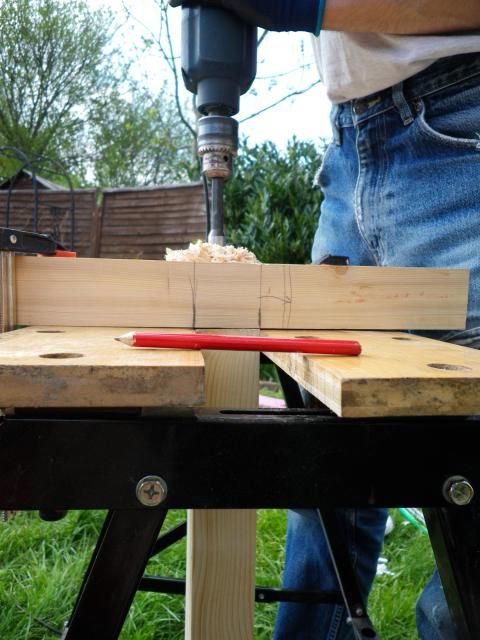
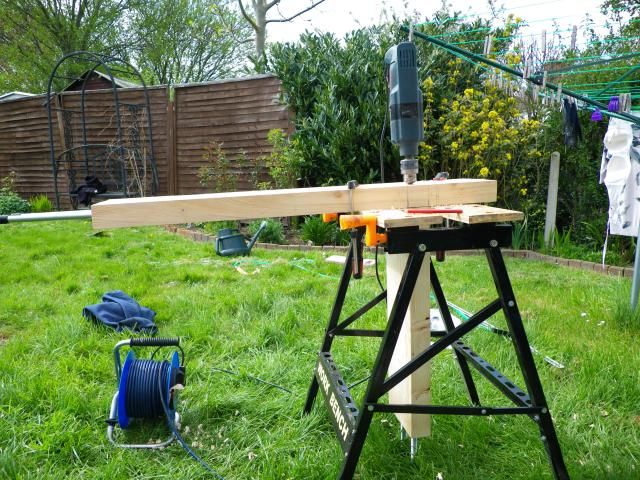
Then I had to carefully mark and drill the holes for the join at the 'T' section
Length of the drill there and in the next pics gives an idea of how deep the hole was - very little margin for error drilling wonky!!!
Then onto final preparation of the joints ready for glueing.
It says you have to make the join water-tight, so they supply wood filler to put over the joints and any holes inside the slot.
This wasn't going to be seen so I wasn't bothered about it being pretty (good job really);
(The PVA you can see in the pics is an attempt to stick the old ceiling back to the underside of the new joist.)
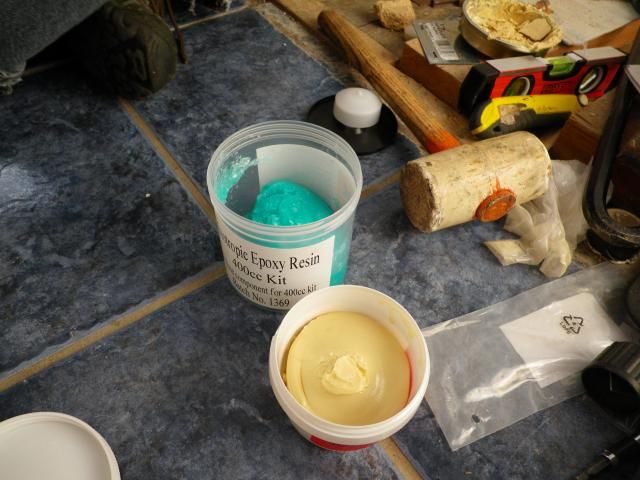
Then time to get messy!!!
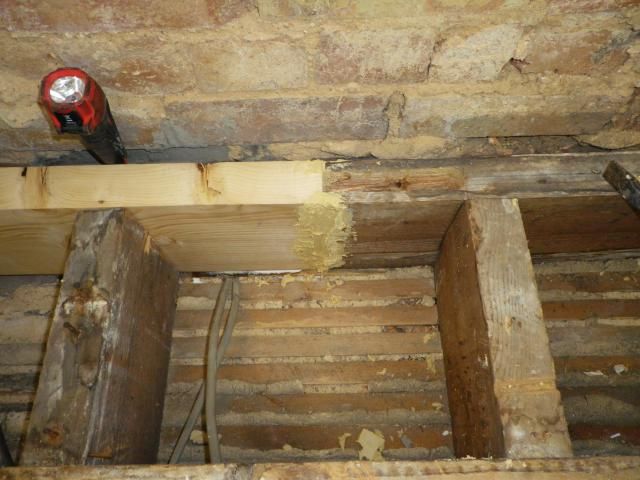
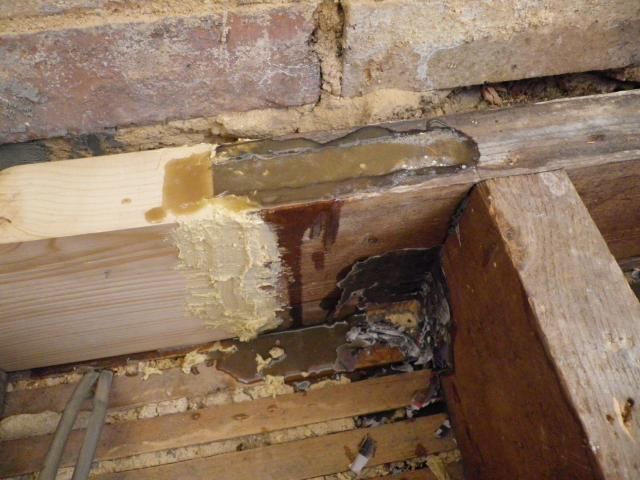
It's a 2 pack liquid epoxy that you mix up in the tub using a paddle on the end of a power drill and then very slowly add in a powder while continuing to stir through. Then you literally pour it into the joint, slowly, so it properly fills from the bottom without trapping air. It starts going off very quickly - the white stuff you can you see on the top here is tiny bubbles releasing.

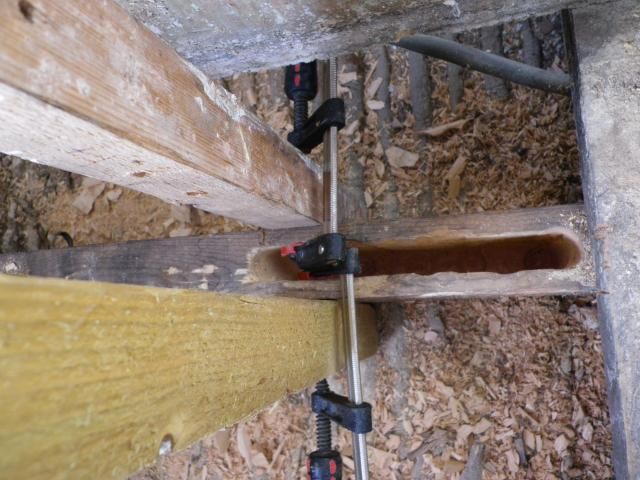
That joint went ok, without any leaks. The other side was a nightmare it didn't leak from the splice joint, but somehow got through into the original joist tenon joint next to the end of the slot - they weren't kidding when they said the joint needs to be water tight and it'll seep/find any tiny hole, I couldn't see ANY way into that joint from inside the slot before I started pouring!!! These are pics after it's all gone off and you can see where it leaked out;
Urgent clamping of bits of square timber into the corner of the joint, with newspaper wrapped between them was needed to stem the flood and then top up the resin in the slot again. Lucky it worked 'cause there was no spare resin to try again later!
I did jobby myself when I first saw it pissing out, but in the end no harm done - all it will have done is strengthened the original tenon joint in fact
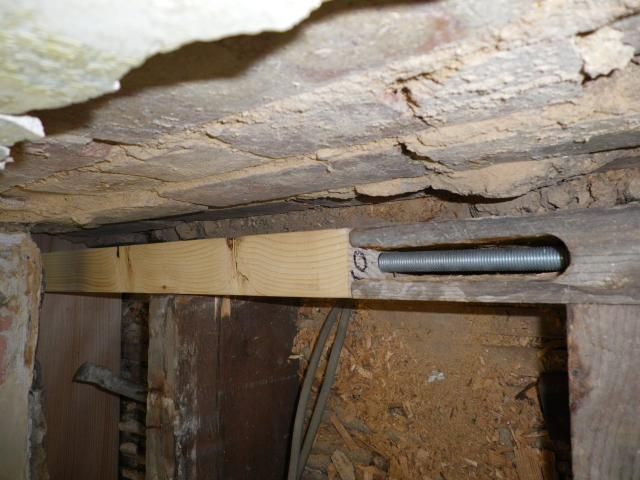
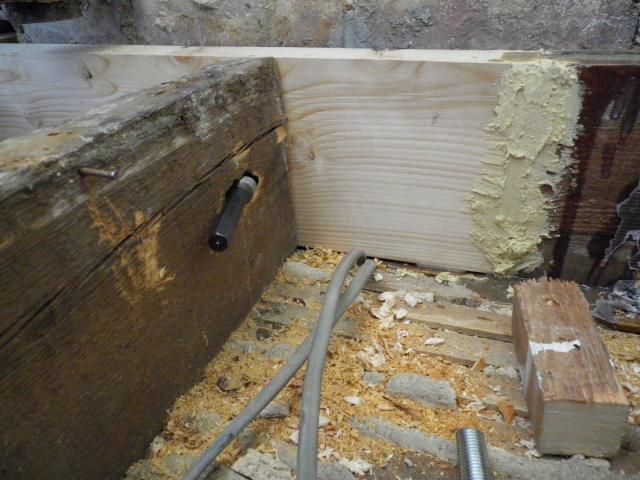
This pic also shows in the background the steel rod that will be used to tie the beam and old joist together (I'd had to cut the joist off from the old beam)
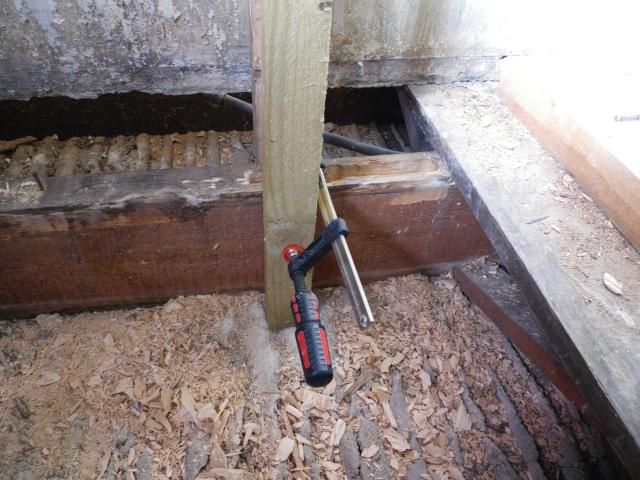
It had to be drilled at a really shallow angle being careful not to break through the side of the joist and go right deep into the new beam, but I didn't want to go through it (didn't know how thick the resin for this would be and sure as hell couldn't get between the beam and wall to stop any flood!)
Another properly deep hole!

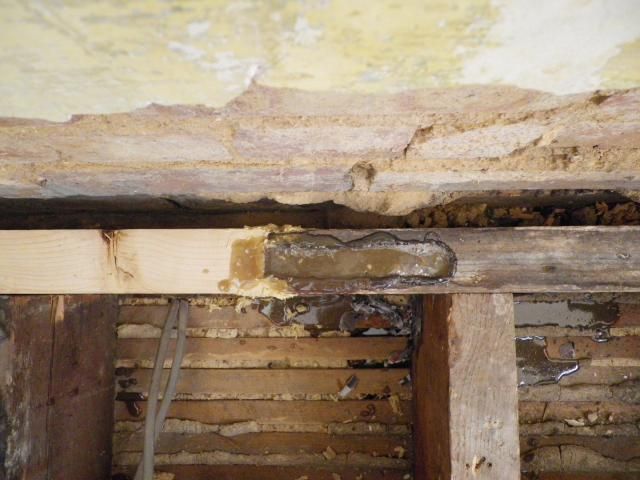
The resin for this part is really thick rather than liquify and the idea is you inject it deep into the hole using a syringe (supplied) and withdraw the syringe as you inject it, so it fills the hole properly from the bottom. When mixed, I can best describe it as the consistency of thick grease. Added bonus - one part of it is a really funky green
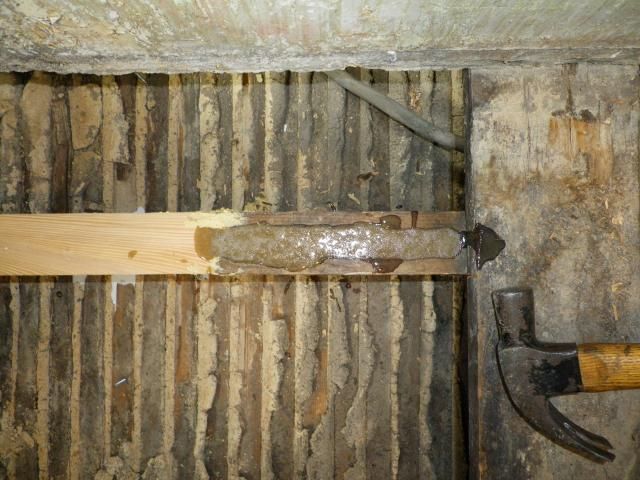
So this is the end of the beam after the holes have been injected with resin and the steel rods pushed in (you twist them in so they go down without pushing the resin out)
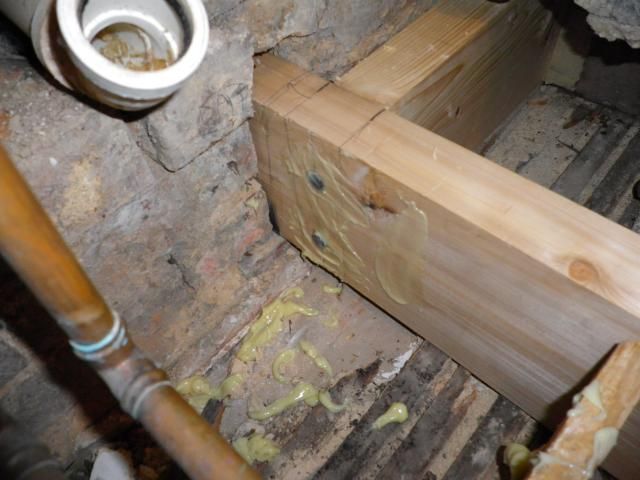
Again, won't be seen so I wasn't too bothered about it being a bit messy. It would be possible to do this with a really really neat finish though - I love the idea of a building a structure using this type of joining on all the exposed joints. It would look like straight butt joints that should never hold anything up, then you'd be able to see the neat engineering magic that makes it happen
Other joint
And that was it for all the splicing.
The poured resin goes off really quite quickly (thickens within a couple of hours, hard after 12 hours but I left for 48 as it suggested).
The injecting resin takes AAAAAGGGGEEEESSSSSSS to go off. I wish I'd known that, 'cause I wouldn't have rushed that part so much, but you live and learn. Basically 12-18 hours later, you could still prod indentations in it. It only started to surface harden after 24 hours and I definitely left this 48 hours before doing any more work, as a result.
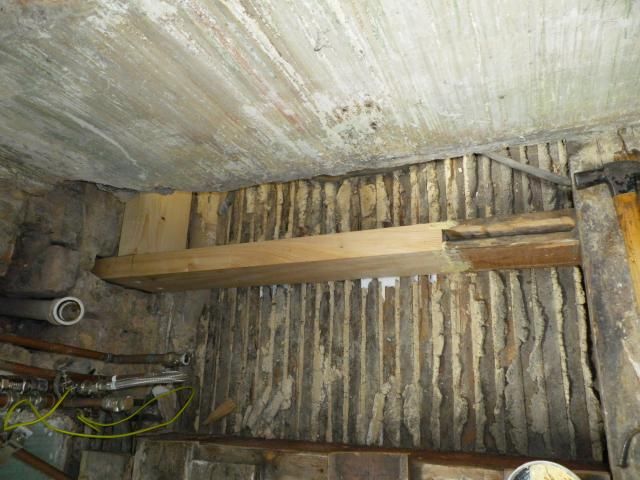
Then it was onto refitting the floor using reclaimed timber so it was the right thickness. (Different width, but you don't see it!)
I cut off all the boards next door short next to the wall in case of any future problems - I'd had to lift about a third of the whole floor in this room originally, because some of the boards ran the full length of the room before going under the wall and they're all now screwed rather than nailed down (hate nailed boards)
Remnants of the pouring resin visible in that tub

Everything now rot treated to within an inch of its life and the new joist sits on a piece of damp proof course too!!!
I lifted the floor as high as I could with the acro's, then packed under the end of the joist using these galvanised metal pieces bought from B&Q (they're meant for something different but suited perfectly)
Then set about recitfying more of the previous crap building work - nice to leave great gaps in single course supporting walls like this and massive places for the wind to come through from the cavity! 
The floor still didn't quite reach the bottom of the wall all the way along, though the corner I'd re-patched in was set properly on the boards at least. I've filled the remaining gap with expanding foam, which should be adequate to support the short section of the block work wall that isn't on the floor.
Then that meant I was finally back to where I'd started about 4 weeks before and could put the new bath in!!!!
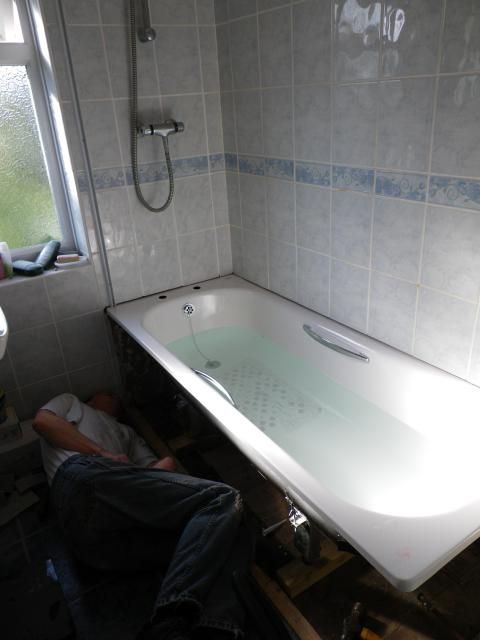
Oh! And NO damage to the ceiling below, either (which was the main reason for doing it this way, plus much much much less material costs). RESULT!!!
So after poking about to remove all the loose rotten stuff and clear the mounds of debris around the joists left by previous crap builders


(The number of rotten floor boards actually continue further right out of this picture)
Started chopping out the floor boards to get a better view while still leaving them in place under the wall for now - that internal block work wall isn't tied in to the external brick wall

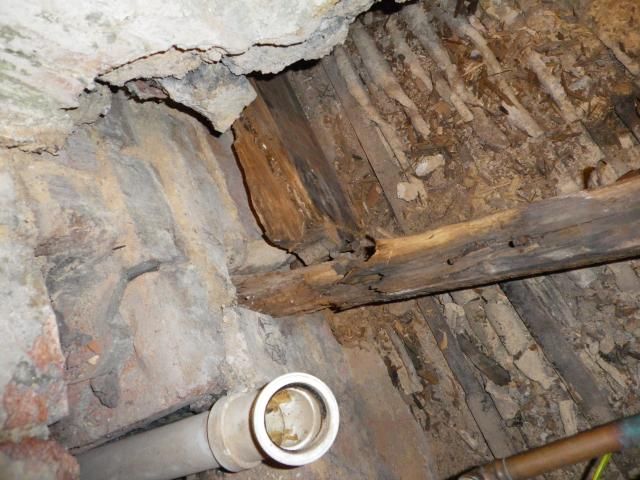
You can see the joist had dropped in the wall socket as well as badly rotted away at the top.


And the floor had dropped away from the wall it's supposed to be holding up!


(About 2/3rds of the way along the wall :roll)

This is the basics of the repair kit I'd ordered. The length on the left goes into the wall and I'll cut to suit, the outer ends with the rods go into the good bits left of the existing joists.

It includes pouring resin kits (the 2 big tubs), an injecting resin kit (wrapped in the polythene), proper rot treatment/protector stuff, gloves, wood filler and the new joist sections.
I could have just bought timber locally and drilled/inserted the rods myself to save money, but the old joists don't match modern timber sizes, so doing it this way meant they planed the new joist sections to exactly match (plus at least I know one half of the splice joints has been done by someone that knew what they were doing
Total cost of that lot ordered over e-mail/the phone to drawings I sent them; £295.68 inc VAT!
So onto getting ready to put the new joists in. First job, support the ends of the joists/beam that will be left in.

Yes, that meant dismantling the kitchen; washing machine out, sink out, cut out the bottom of the cupboard under that so the acro stand could reach the floor and move the fridge into the living room

I managed to get the washing machine back in, at an angle so at least that was still usable.
Back upstairs, I decided since the wall was sort of hanging there anyway I'd just remove the floorboards under it as far as I needed and hope it didn't fall down (up until I discovered the floor had dropped away from the wall, I did have a method of supporting the wall while removing the floor worked out after speaking to that company, but this saved a lot of time/arsing about). Calculated risk
Then drill a 'slot' in the old joist. Have to be very careful not to split the joist (that's why you drill before cutting the rotten end off) or drill too deep/wonky so it retains enough strength and isn't too deep for the pre-determined amount of resin in the kit.

I used an arguer drill bit - much faster than a flat wood bit and also removes the chipping. BOY are they aggressive on the end of a power drill though!!!
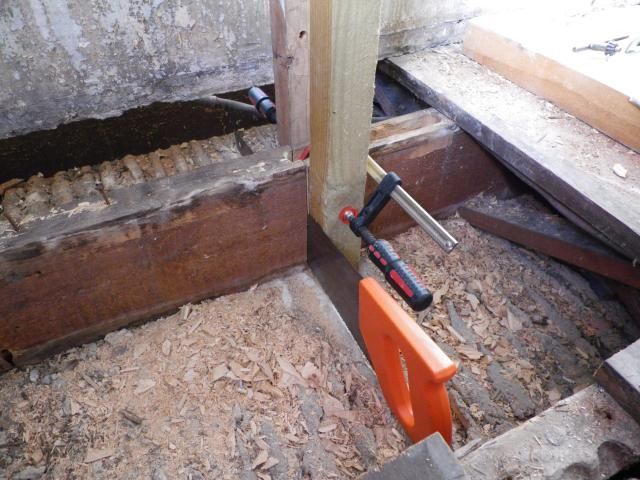
Cleaned up the edges of the slot a bit with a chisel, then clamped some guides in place so I could cut the end off properly square


Cutting it took bloody ages and sods law, of course where I'd chosen to the cut went right down onto a nail holding the lath on below, so I had to swap back/forth with a hacksaw at the end
Scary stuff!

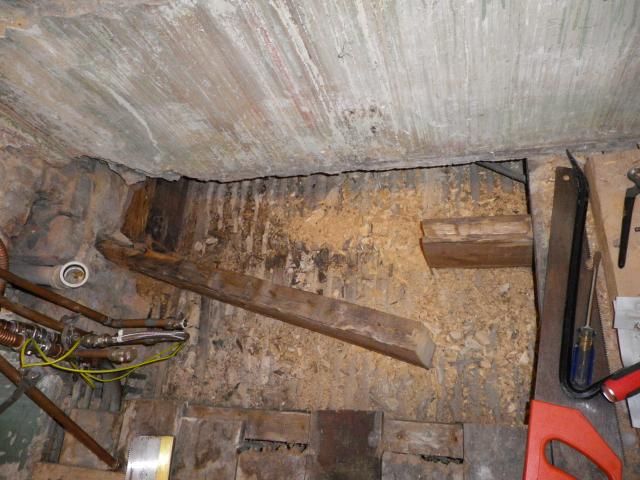
A lot of yanking upwards later to get it away from the nails in the laths and;
FREEDOM!!!


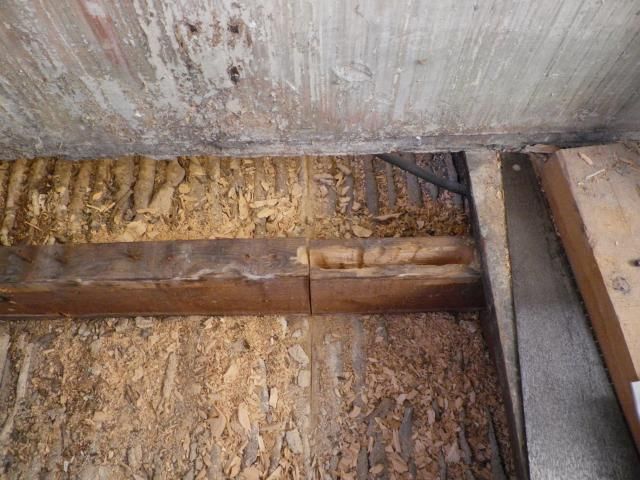
Pulling it away from the end of the beam showed more how rotted it was

Once out I also discovered the builders hadn't done the brickwork right, where the joist sits on it - it should ideally sit on a flat pad stone, or at the very least with the brick upturned so it has a properly flat surface. But no, they'd left it with the brick recess side up, so the joist had point loading
New one offered up into position to test


Then repeat the process in the bedroom to remove the beam - this was much, much more of an arse to do, because the space was even more constrained and the adjacent joist joints. And once the old one was out, I discovered yet another nasty - the wooden lintel over the kitchen window looked dodgy and when I poked around on it, that had also been rotted by the water

To be honest I'd properly had enough of all this by then and really didn't fancy propping the inner and outer cavity walls, then removing bricks from the outer wall so I could replace the lintel!!!
By my reckoning it didn't really carry much weight, there was still a lot of it there and I probably plan to extend the kitchen outwards through that wall at some point, which would mean the lintel coming out and being replaced by an RSJ anyway, so I decided to just hack out all the rotten stuff and properly rot treat it;


I also then repaired the mortar around those bricks and between the brick and the lintel (didn't take pics)
New beam offered up into position.


And the other end in the bathroom

Then I had to carefully mark and drill the holes for the join at the 'T' section

Length of the drill there and in the next pics gives an idea of how deep the hole was - very little margin for error drilling wonky!!!


Then onto final preparation of the joints ready for glueing.
It says you have to make the join water-tight, so they supply wood filler to put over the joints and any holes inside the slot.
This wasn't going to be seen so I wasn't bothered about it being pretty (good job really


(The PVA you can see in the pics is an attempt to stick the old ceiling back to the underside of the new joist.)
Then time to get messy!!!
It's a 2 pack liquid epoxy that you mix up in the tub using a paddle on the end of a power drill and then very slowly add in a powder while continuing to stir through. Then you literally pour it into the joint, slowly, so it properly fills from the bottom without trapping air. It starts going off very quickly - the white stuff you can you see on the top here is tiny bubbles releasing.


That joint went ok, without any leaks. The other side was a nightmare


Urgent clamping of bits of square timber into the corner of the joint, with newspaper wrapped between them was needed to stem the flood and then top up the resin in the slot again. Lucky it worked 'cause there was no spare resin to try again later!
I did jobby myself when I first saw it pissing out, but in the end no harm done - all it will have done is strengthened the original tenon joint in fact
This pic also shows in the background the steel rod that will be used to tie the beam and old joist together (I'd had to cut the joist off from the old beam)

It had to be drilled at a really shallow angle being careful not to break through the side of the joist and go right deep into the new beam, but I didn't want to go through it (didn't know how thick the resin for this would be and sure as hell couldn't get between the beam and wall to stop any flood!)

Another properly deep hole!


The resin for this part is really thick rather than liquify and the idea is you inject it deep into the hole using a syringe (supplied) and withdraw the syringe as you inject it, so it fills the hole properly from the bottom. When mixed, I can best describe it as the consistency of thick grease. Added bonus - one part of it is a really funky green

So this is the end of the beam after the holes have been injected with resin and the steel rods pushed in (you twist them in so they go down without pushing the resin out)

Again, won't be seen so I wasn't too bothered about it being a bit messy. It would be possible to do this with a really really neat finish though - I love the idea of a building a structure using this type of joining on all the exposed joints. It would look like straight butt joints that should never hold anything up, then you'd be able to see the neat engineering magic that makes it happen
Other joint

And that was it for all the splicing.
The poured resin goes off really quite quickly (thickens within a couple of hours, hard after 12 hours but I left for 48 as it suggested).
The injecting resin takes AAAAAGGGGEEEESSSSSSS to go off. I wish I'd known that, 'cause I wouldn't have rushed that part so much, but you live and learn. Basically 12-18 hours later, you could still prod indentations in it. It only started to surface harden after 24 hours and I definitely left this 48 hours before doing any more work, as a result.
Then it was onto refitting the floor using reclaimed timber so it was the right thickness. (Different width, but you don't see it!)
I cut off all the boards next door short next to the wall in case of any future problems - I'd had to lift about a third of the whole floor in this room originally, because some of the boards ran the full length of the room before going under the wall

Remnants of the pouring resin visible in that tub


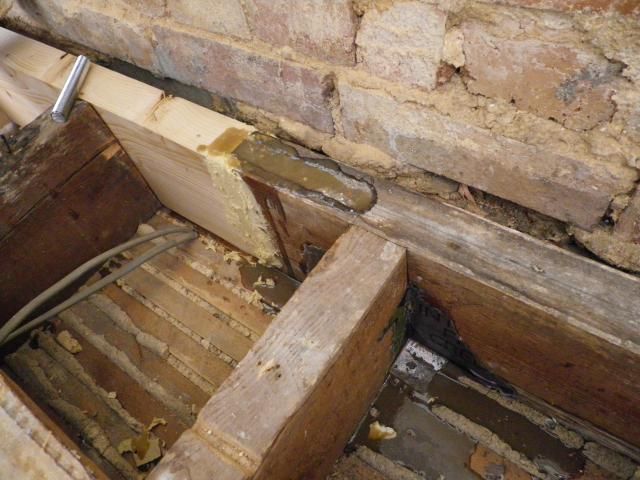
Everything now rot treated to within an inch of its life and the new joist sits on a piece of damp proof course too!!!
I lifted the floor as high as I could with the acro's, then packed under the end of the joist using these galvanised metal pieces bought from B&Q (they're meant for something different but suited perfectly)


Then set about recitfying more of the previous crap building work - nice to leave great gaps in single course supporting walls like this and massive places for the wind to come through from the cavity!


The floor still didn't quite reach the bottom of the wall all the way along, though the corner I'd re-patched in was set properly on the boards at least. I've filled the remaining gap with expanding foam, which should be adequate to support the short section of the block work wall that isn't on the floor.
Then that meant I was finally back to where I'd started about 4 weeks before and could put the new bath in!!!!

Oh! And NO damage to the ceiling below, either (which was the main reason for doing it this way, plus much much much less material costs). RESULT!!!
Last edited by wurlycorner on Tue May 21, 2013 3:06 pm, edited 2 times in total.
--
Iain.
Iain.
Super Secret 1G (not really super secret!)
-
wurlycorner
- Ye are glad to be dead, RIGHT?
- Posts: 21511
- Joined: Sat May 19, 2012 3:33 pm
- My Generation: 4G
- Location: Chelmsford, Essex
- Has thanked: 2507 times
- Been thanked: 317 times


-
NafemanNathan

- LotM Winner
- Posts: 20144
- Joined: Sun Aug 08, 2010 9:37 pm
- My Generation: 0G
- Location: Yeovil, Somerset
- Has thanked: 8 times
- Been thanked: 124 times
I take my hat off to you bud and big respect 
Not many people would have chosen to take that job on themselves and as a consequence would have probably paid at least ten times as much as you did. You've done a much more professional job that most traders would have too
I bet you're well happy with yourself Plus I think you made the right call with the down stairs window lintel too
Not many people would have chosen to take that job on themselves and as a consequence would have probably paid at least ten times as much as you did. You've done a much more professional job that most traders would have too
I bet you're well happy with yourself

-
wurlycorner
- Ye are glad to be dead, RIGHT?
- Posts: 21511
- Joined: Sat May 19, 2012 3:33 pm
- My Generation: 4G
- Location: Chelmsford, Essex
- Has thanked: 2507 times
- Been thanked: 317 times
Thanks, yep I'm pretty pleased with myself and all in cost only a few hundred, so that's a massive result.
Money sort of dictated having to do it myself really (not having a job) and I really didn't fancy the aggro and massive mess of having the kitchen ceiling down, which is how a builder would have wanted to do it
Mind you, that meant longer for job getting done so longer with the inconvenience of washing up in the bathroom sink and I STILL keep going into the living room to get a beer out of the fridge!!!
--
Iain.
Iain.
Super Secret 1G (not really super secret!)