Congratulations to vtecmec for winning May/June's Lude Of The Month, with his DIY Turbo BB1 build.

>>> Click Here For Profile <<<

Image

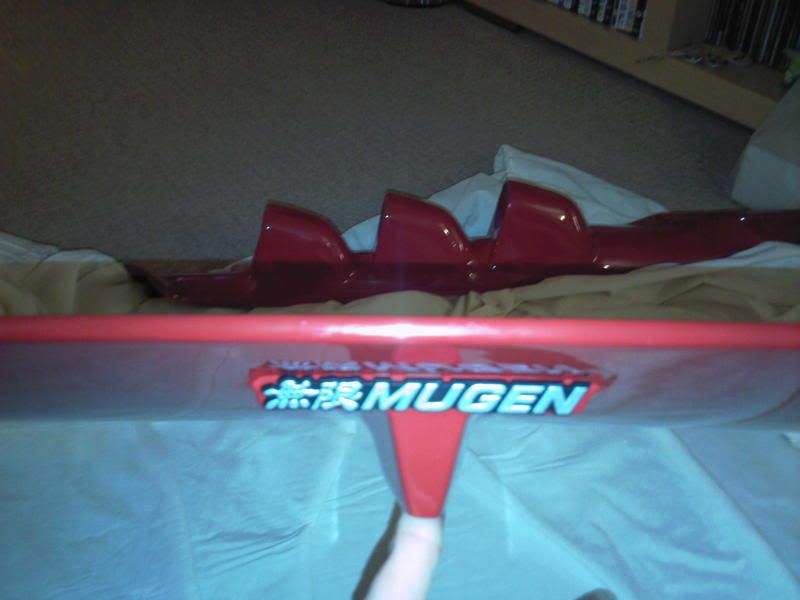
MUGEN wing

Oooooo .... shiny!
User avatar
K30DPC
LotM Winner
Posts: 1106
Joined: Fri Aug 09, 2013 7:45 am
My Generation: 4G
Location: GB/Poland
Has thanked: 17 times
Been thanked: 17 times

MUGEN wing

Post by K30DPC » Mon Sep 09, 2013 5:19 pm

Finally I get my mugen wing. Looks like original one even has badge. I'm quite happy as I paid 80 quid. Don't know is it bargain or not but it doesn't really matter when you finally get what you wanted, isn't it? It was painted black/graphite, unfortunately including badge :lol: :( :( :(

And I have some questions about it.
1. Anyone of you guys was replacing badge with new one, or have you got auction link to matching one please?
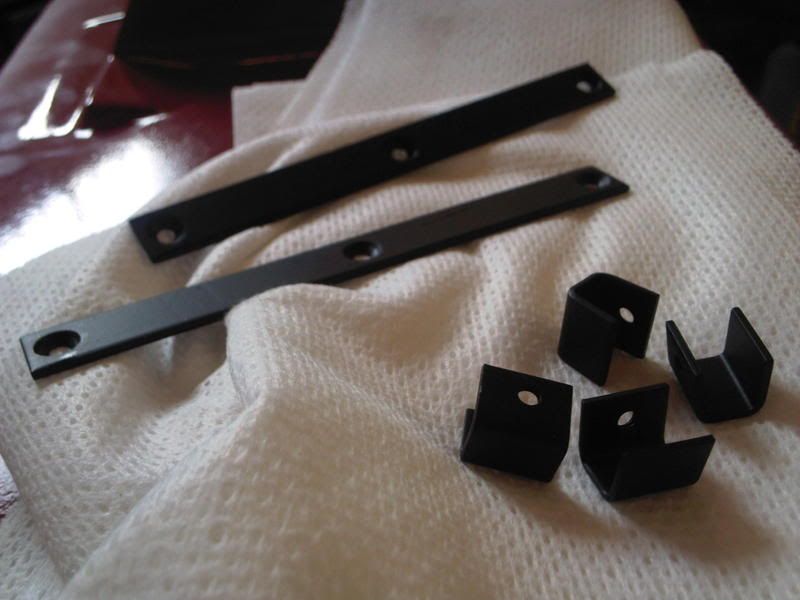
2. Can You post pictures how is it installed. I mean mounting brackets as I'm not sure about it. I though I would have to drill new holes in the trunk lid and screw it trough them, but when I see this wing I'm getting confused.

And one more. Did mugen make rear bumper for 4gen?

User avatar
batkosio
Posts: 326
Joined: Thu Apr 12, 2012 1:38 pm
My Generation: 4G
Location: Varna, Bulgaria
Has thanked: 69 times
Been thanked: 6 times
Contact:

Post by batkosio » Mon Sep 09, 2013 5:48 pm

1. I did, don`t have the auction link anymore, but just look in ebay for the same:

Image

2. Tomorrow will take some pics of the brackets, no need for drilling, and you need a non spoiler/no holes trunk lid.

3. No, nothing for the rear, they even didn`t bother to remove the rear mudguards from the catalogue photos, and it look ugly!!!
"Winning is like a drug, I cannot justify in any circumstances coming second or third."
Ayrton Senna da Silva
Image

User avatar
W1ggz
Posts: 2524
Joined: Sun Jul 22, 2012 3:10 pm
My Generation: 4G
PSN GamerTag: W1GGZ
Location: Portishead nr Bristol
Contact:

Re: MUGEN wing

Post by W1ggz » Mon Sep 09, 2013 5:52 pm

You don't need to drill any new holes in the boot but you do need to fill the old ones so you don't have a leak you need 4 small C shaped brackets and some lug nuts to hold it on.

User avatar
K30DPC
LotM Winner
Posts: 1106
Joined: Fri Aug 09, 2013 7:45 am
My Generation: 4G
Location: GB/Poland
Has thanked: 17 times
Been thanked: 17 times

Post by K30DPC » Mon Sep 09, 2013 6:05 pm

batkosio I have this badge but painted for the same colour as wing :evil: Somebody didn't bother about it. Thanks for this photo and I'm waiting for another one. I feel I will have to make them brackets. Can You please also measure them?

Thanks guys

User avatar
Ferdie
LotM Winner
Posts: 562
Joined: Fri Feb 03, 2012 8:05 pm
My Generation: 4G
XBOX GamerTag: fieszefreddie
Location: The Netherlands
Been thanked: 1 time

Post by Ferdie » Mon Sep 09, 2013 7:24 pm

I've drilled them in the trunk ;)

Also have the replica brackets but drilled is Better i think

User avatar
batkosio
Posts: 326
Joined: Thu Apr 12, 2012 1:38 pm
My Generation: 4G
Location: Varna, Bulgaria
Has thanked: 69 times
Been thanked: 6 times
Contact:

Post by batkosio » Mon Sep 09, 2013 7:46 pm

Ferdie wrote:Also have the replica brackets but drilled is Better i think
First I did the same- didn`t use the original brackets, although I had them. But then decided to try them- they fit perfectly, no need for drilling the trunk lid, and with some new double sided adhesive tape on the sides and in the middle- just as Mugen intended the aero spoiler to be installed ;)
Take my advice and use the brackets!
"Winning is like a drug, I cannot justify in any circumstances coming second or third."
Ayrton Senna da Silva
Image

User avatar
K30DPC
LotM Winner
Posts: 1106
Joined: Fri Aug 09, 2013 7:45 am
My Generation: 4G
Location: GB/Poland
Has thanked: 17 times
Been thanked: 17 times

Post by K30DPC » Mon Sep 09, 2013 8:05 pm

I wish but don't have them. Anybody have but not using?

User avatar
nucleustylzlude
Moderator
Posts: 4013
Joined: Wed Aug 11, 2010 11:46 pm
My Generation: 4G
Location: Bristol, UK!
Been thanked: 7 times
Contact:

Post by nucleustylzlude » Mon Sep 09, 2013 9:15 pm

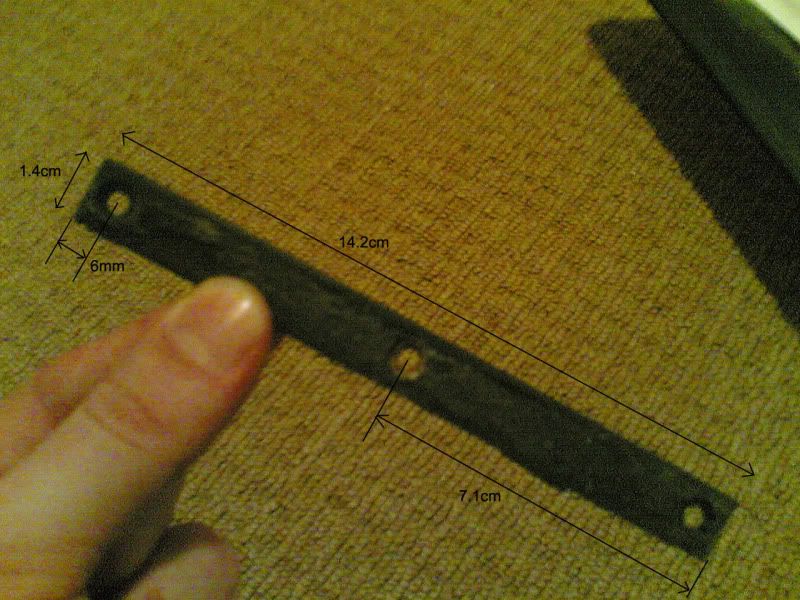
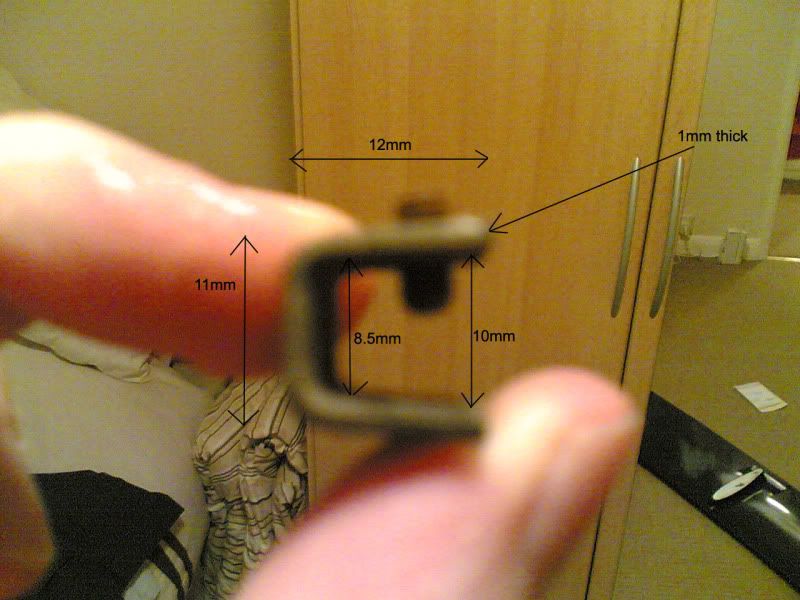
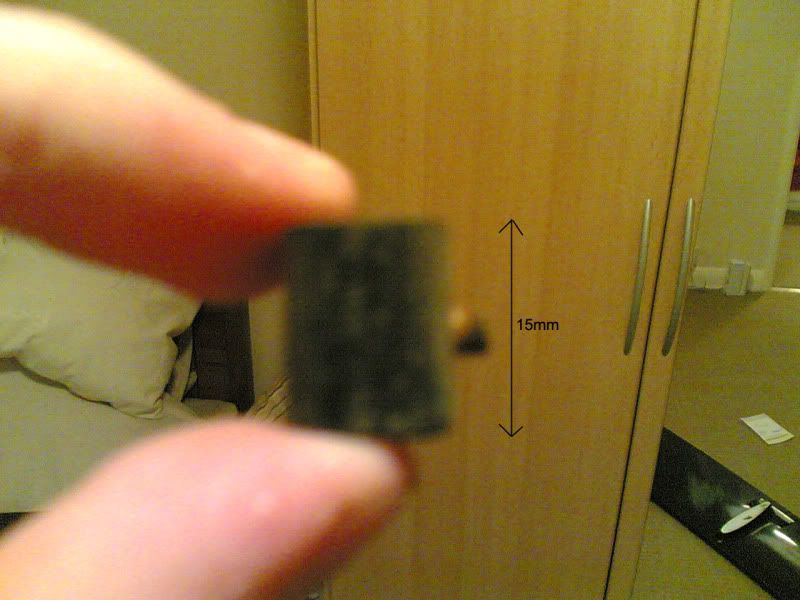
I have the full dims of the brackets from years ago, shown many around the world to make them up. I'll dig them out - there shocking photos mind you but gives you what you need.

If you have the original badge, try some paint thinner and see if you can rub down the graphite colour down to the original badge. Those ebay ones are pretty crap. Cheap plastic and the lamination comes away after a while.

My badge was in a poor state when I first got it, the chrome top was very faded and marked in places, I refreshed the badge myself with some light sanding, matt black and then some Chrome effect paint applied to the top with a paint brush. I'll dig out those pics too. :D

User avatar
nucleustylzlude
Moderator
Posts: 4013
Joined: Wed Aug 11, 2010 11:46 pm
My Generation: 4G
Location: Bristol, UK!
Been thanked: 7 times
Contact:

Post by nucleustylzlude » Mon Sep 09, 2013 10:11 pm

Found them, dims:

Image

Image

Image

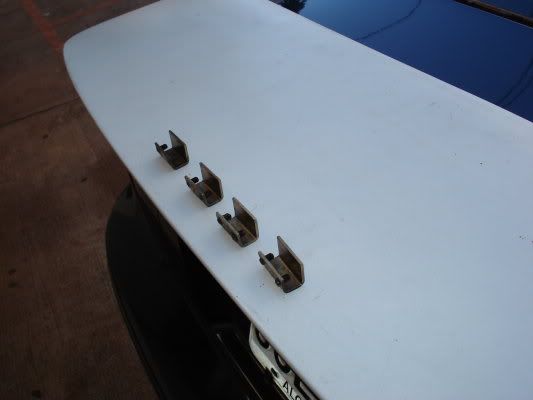
However, I have seen some longer brackets which have two grub screws each, like so:

Image


After a little love:

Image

My badge after some love too:

Image

User avatar
K30DPC
LotM Winner
Posts: 1106
Joined: Fri Aug 09, 2013 7:45 am
My Generation: 4G
Location: GB/Poland
Has thanked: 17 times
Been thanked: 17 times

Post by K30DPC » Mon Sep 09, 2013 10:19 pm

wow thanks a lot mate. This is what I'm looking for. I have the long pieces - they screwed into the wing but I'm missing C clamps. I'll have to make them and with your help it will be piece of cake. Thanks again

And your badge looks very sexi :mrgreen: Good job

Post Reply

Return to “Body Work / Detailing”