My 2.2 vti 5th Gen
Posted: Tue Apr 03, 2012 6:41 pm
I have moved this profile from PUK and will update it here now as this place seems better and busier!!
I thought it was about time I got some pictures up.
I have had the car for about 3 months now. I have wanted a Prelude for a long time but circumstance kept spoiling my plans!
I bought this and it is going to be a long term keeper. The plan is to slowly work through the whole car and get it sorted. For the first time I have a second car that I can use so the major urgency to keep this on the road and running all the time has gone so I should have some time to sort it.
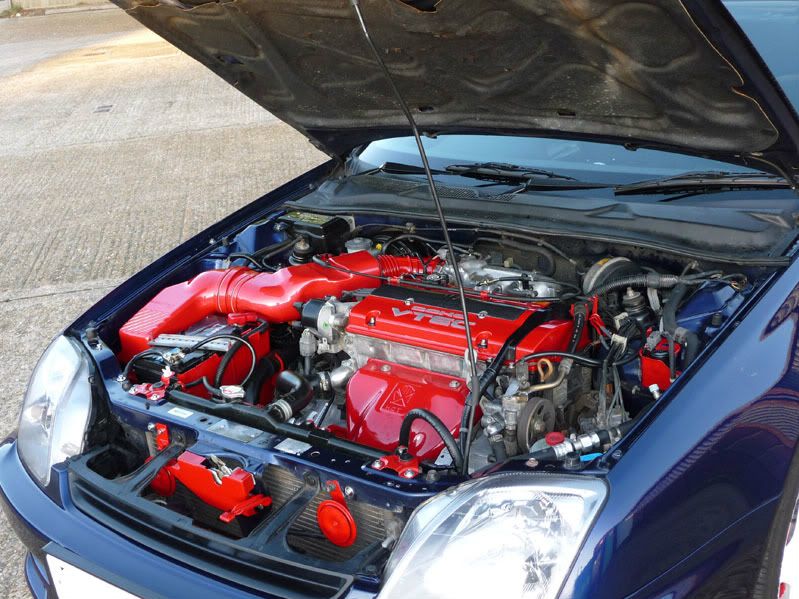
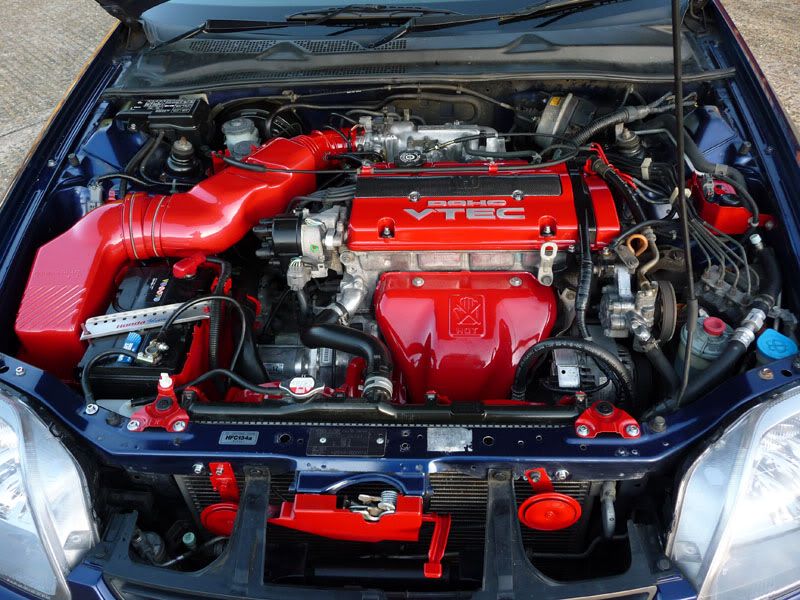
Started with the basics and serviced everything :
Removed throttle body and cleaned out and cleaned up.
Cleaned out IACV
Cleaned out FITV
Cleaned EGR Valve, removed EGR Plugs and cleaned paths out.
Changed fuel filter
Removed stripped and cleaned fuel rail and associated piping
Had injectors ultrasound cleaned and flow tested.
New plugs, leads, coil, dizzy cap and rotor arm.
Sorted Valve Clearances
Cleaned out intake piping and fitted new Air Filter.
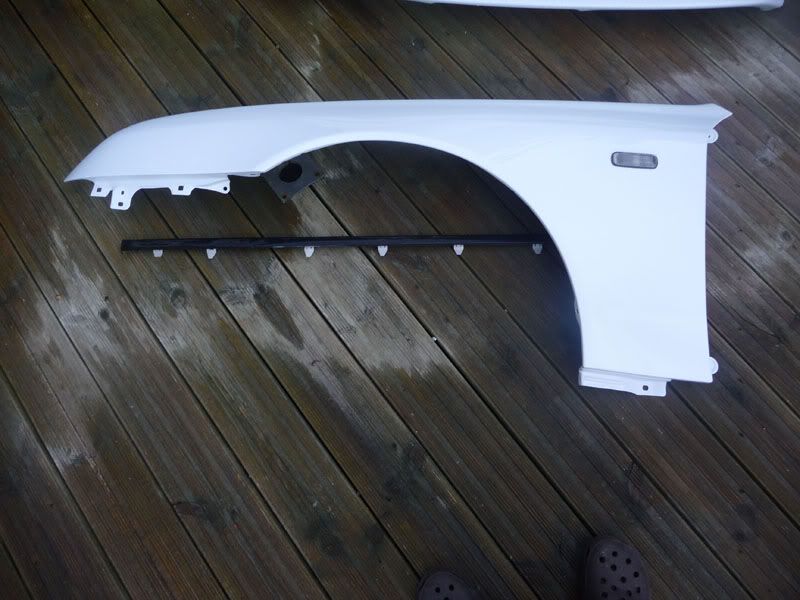
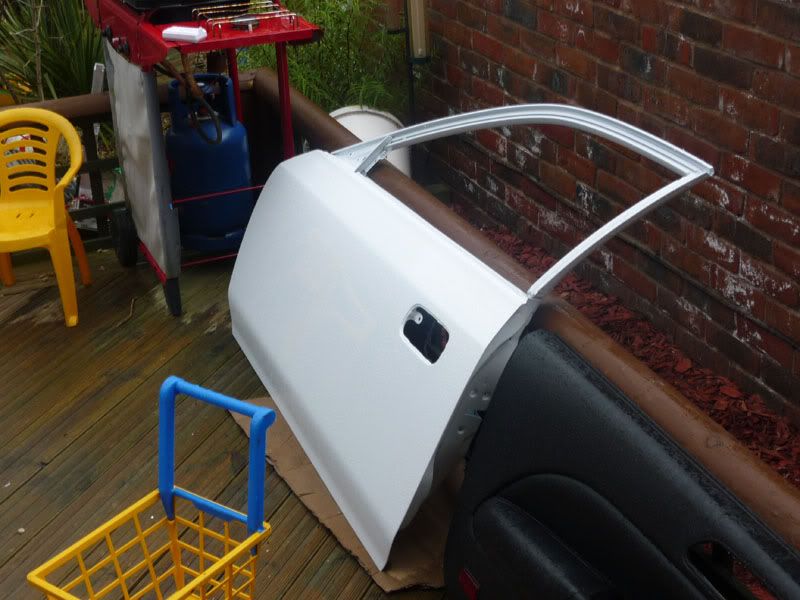
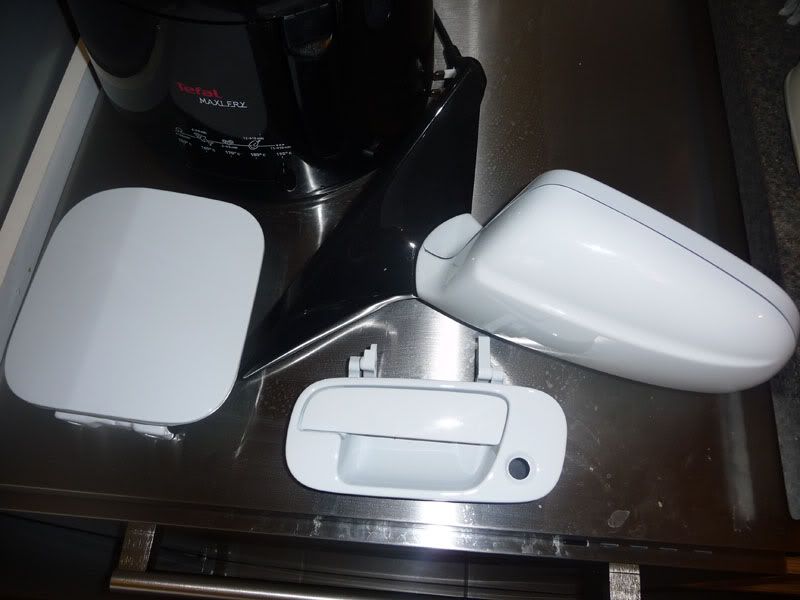
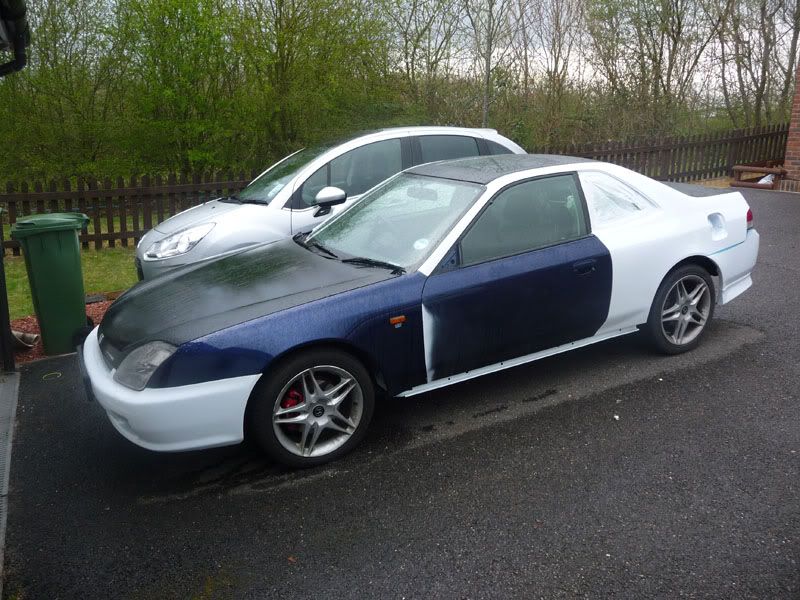
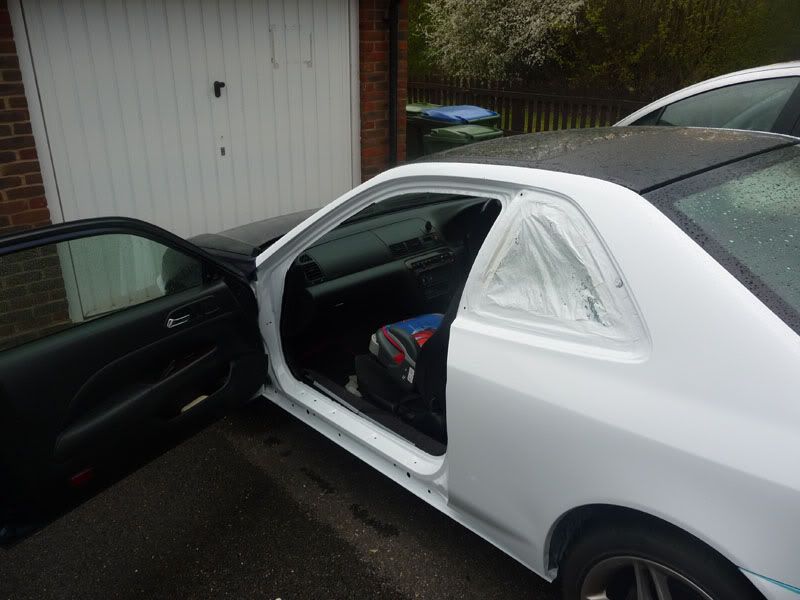
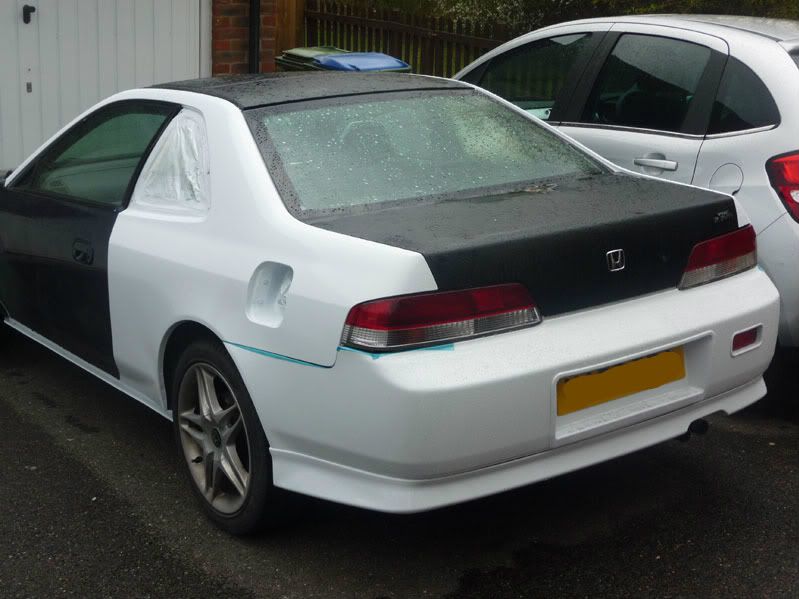
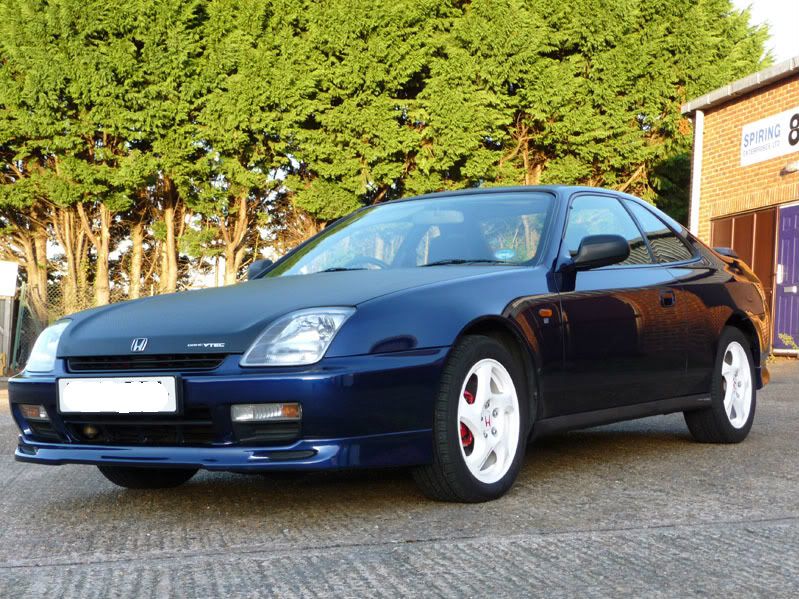
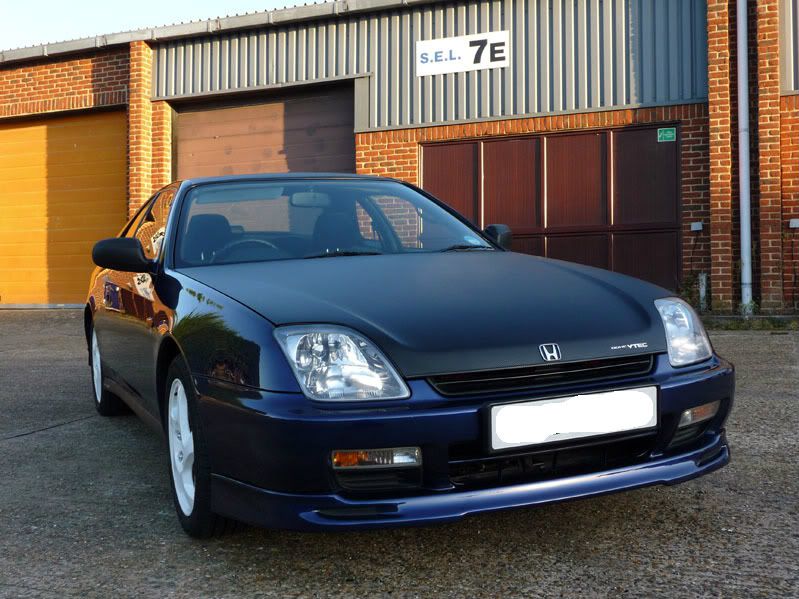
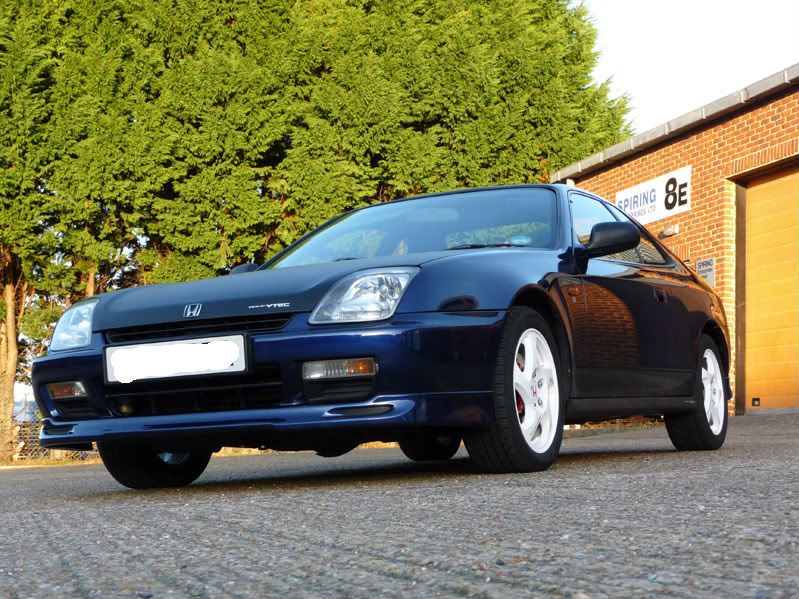
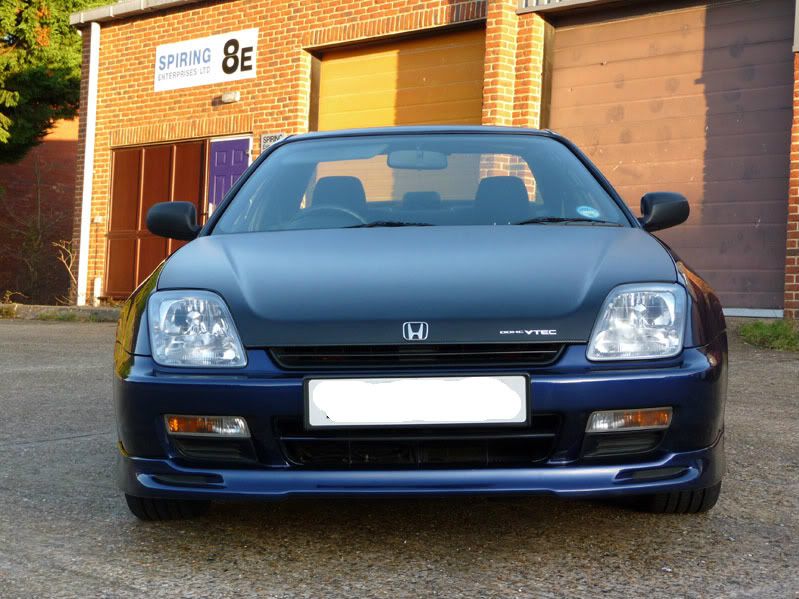
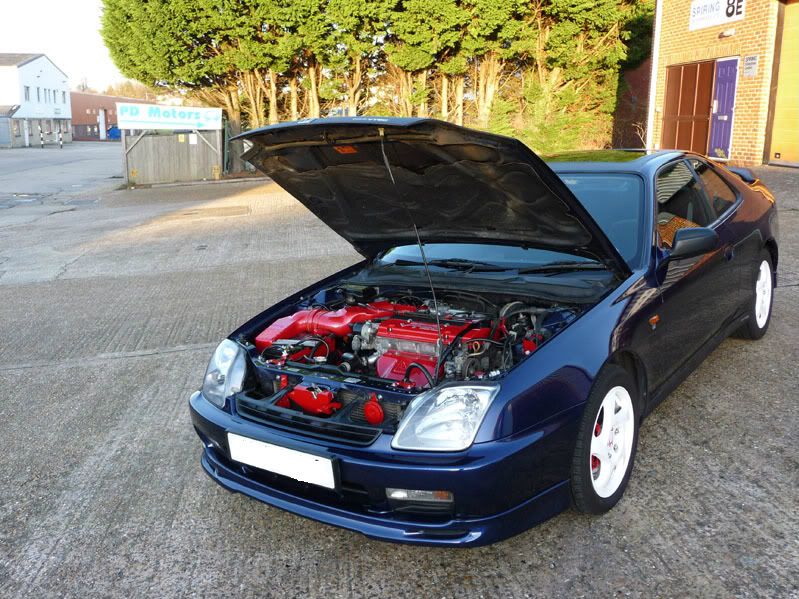
Whole front came off, bonnet, wings, bumper and rear boot lid. All stripped, primed and resprayed with 2 pack. You can't see it in the pics but the amount of stone chips on the car when I bought it was stupid. The plan is to redo the doors, rear bumper and rear wings later on when the weather is better.
I then got the Motegi Lips - courtesy of Ratty. Stripped painted and fitted those.
I then got tired of looking at the very corroded and kerbed wheels. Can't afford new wheels at the moment so they went down to get the tyres off and after much swearing, paint stripper, wire brushes etc they were painted up in epoxy 3 pack white. I am happy with them for now.
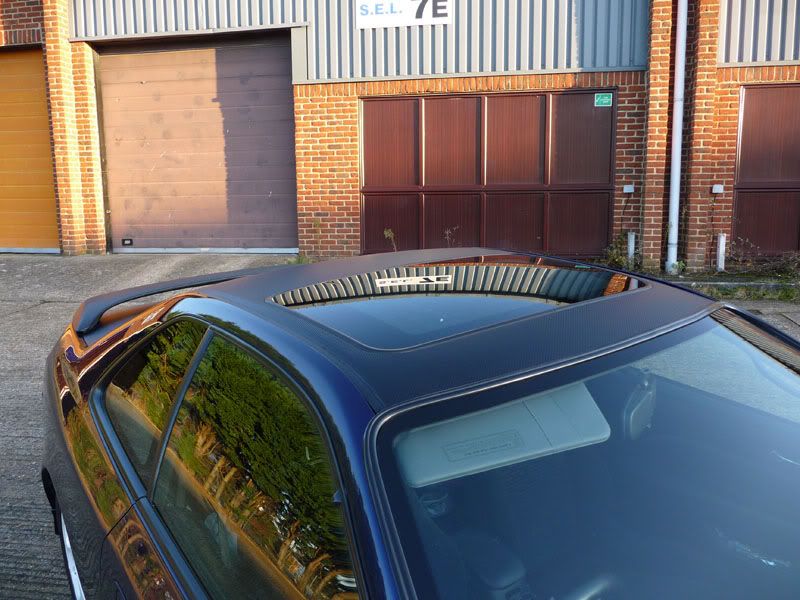
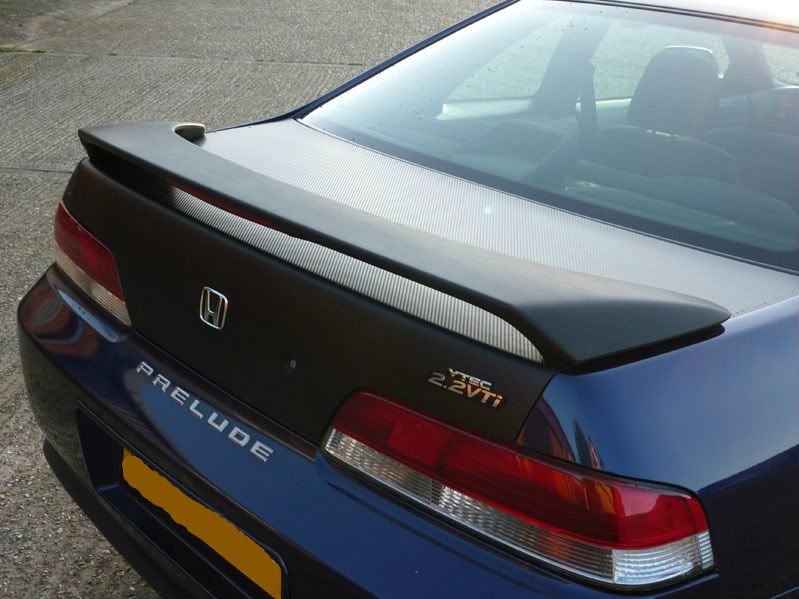
I then acquired a pretty large offcut of 3m Di-Noc carbon wrap. So the bonnet, Roof, Boot lid Rear Spoiler and Side skirts and wing mirrors were all wrapped. Don't ever let anyone tell you it is easy. Took me pretty much a day for each panel to get it right.
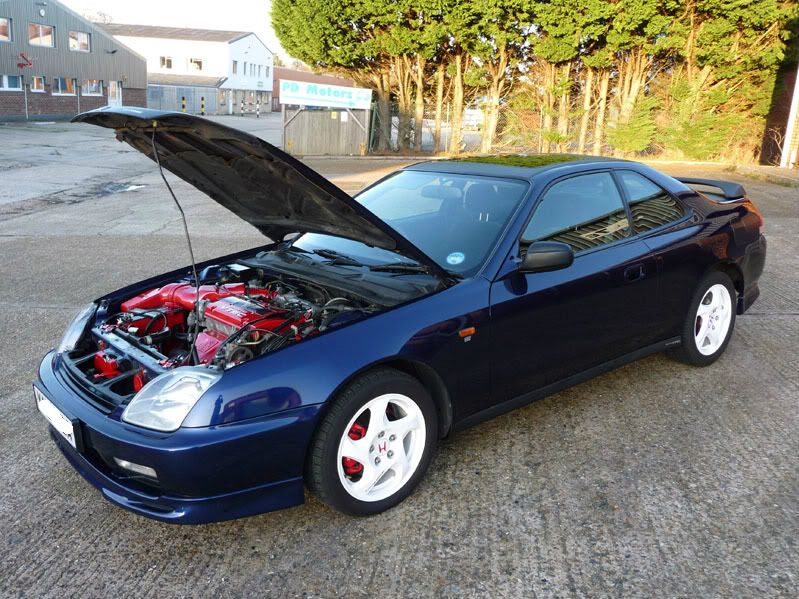
Then I got bored over the Christmas break so I thought it was time to sort of the disgrace of an engine bay. Removed loads of stuff. Cleaned the bay out. Treated any rust I found. Lots of wax on the paintwork. Then sandblasted all the rusty bits (Brackets etc) and gave them a good coat of primer and epoxy paint. All the horrible rusty M6 bolts removed and replaced with M6 Cap Screws and Washers or Bolts and Washers all in stainless with lots of thread lube on them.
So that is where I am now. Next project is get the suspension off and clean/paint and polybush it all. I am waiting for the spring for that one though.
Let me know what you think. I know Carbon is not everyone's cup of tea but I like the finished look
I will keep this updated as I go along
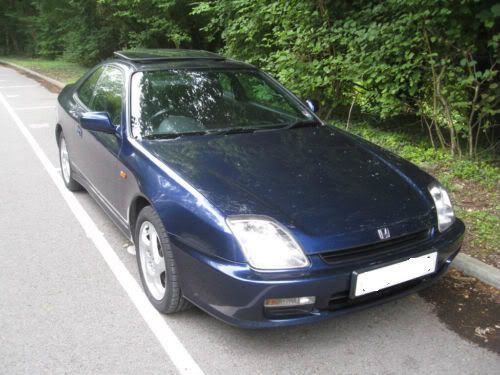
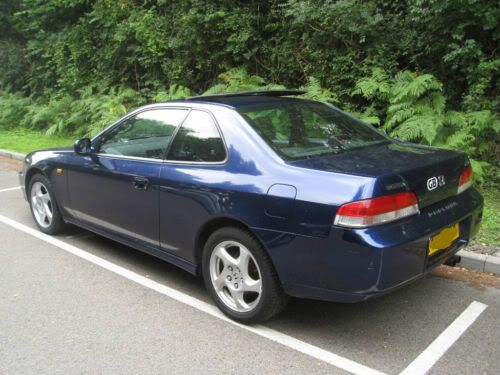
When I bought it :
The Car Now :

I thought it was about time I got some pictures up.
I have had the car for about 3 months now. I have wanted a Prelude for a long time but circumstance kept spoiling my plans!
I bought this and it is going to be a long term keeper. The plan is to slowly work through the whole car and get it sorted. For the first time I have a second car that I can use so the major urgency to keep this on the road and running all the time has gone so I should have some time to sort it.
Started with the basics and serviced everything :
Removed throttle body and cleaned out and cleaned up.
Cleaned out IACV
Cleaned out FITV
Cleaned EGR Valve, removed EGR Plugs and cleaned paths out.
Changed fuel filter
Removed stripped and cleaned fuel rail and associated piping
Had injectors ultrasound cleaned and flow tested.
New plugs, leads, coil, dizzy cap and rotor arm.
Sorted Valve Clearances
Cleaned out intake piping and fitted new Air Filter.
Whole front came off, bonnet, wings, bumper and rear boot lid. All stripped, primed and resprayed with 2 pack. You can't see it in the pics but the amount of stone chips on the car when I bought it was stupid. The plan is to redo the doors, rear bumper and rear wings later on when the weather is better.
I then got the Motegi Lips - courtesy of Ratty. Stripped painted and fitted those.
I then got tired of looking at the very corroded and kerbed wheels. Can't afford new wheels at the moment so they went down to get the tyres off and after much swearing, paint stripper, wire brushes etc they were painted up in epoxy 3 pack white. I am happy with them for now.
I then acquired a pretty large offcut of 3m Di-Noc carbon wrap. So the bonnet, Roof, Boot lid Rear Spoiler and Side skirts and wing mirrors were all wrapped. Don't ever let anyone tell you it is easy. Took me pretty much a day for each panel to get it right.
Then I got bored over the Christmas break so I thought it was time to sort of the disgrace of an engine bay. Removed loads of stuff. Cleaned the bay out. Treated any rust I found. Lots of wax on the paintwork. Then sandblasted all the rusty bits (Brackets etc) and gave them a good coat of primer and epoxy paint. All the horrible rusty M6 bolts removed and replaced with M6 Cap Screws and Washers or Bolts and Washers all in stainless with lots of thread lube on them.
So that is where I am now. Next project is get the suspension off and clean/paint and polybush it all. I am waiting for the spring for that one though.
Let me know what you think. I know Carbon is not everyone's cup of tea but I like the finished look
I will keep this updated as I go along
When I bought it :
The Car Now :